Elastic APM
Tracetest fetches traces from Elasticsearch's default port 9200.
Examples of configuring Tracetest can be found in the examples folder of the Tracetest GitHub repo.
Configure Tracetest to Use Elastic APM as a Trace Data Store
Configure Tracetest to fetch trace data from Elasticsearch.
Tracetest uses Elasticsearch's default port 9200 to fetch trace data.
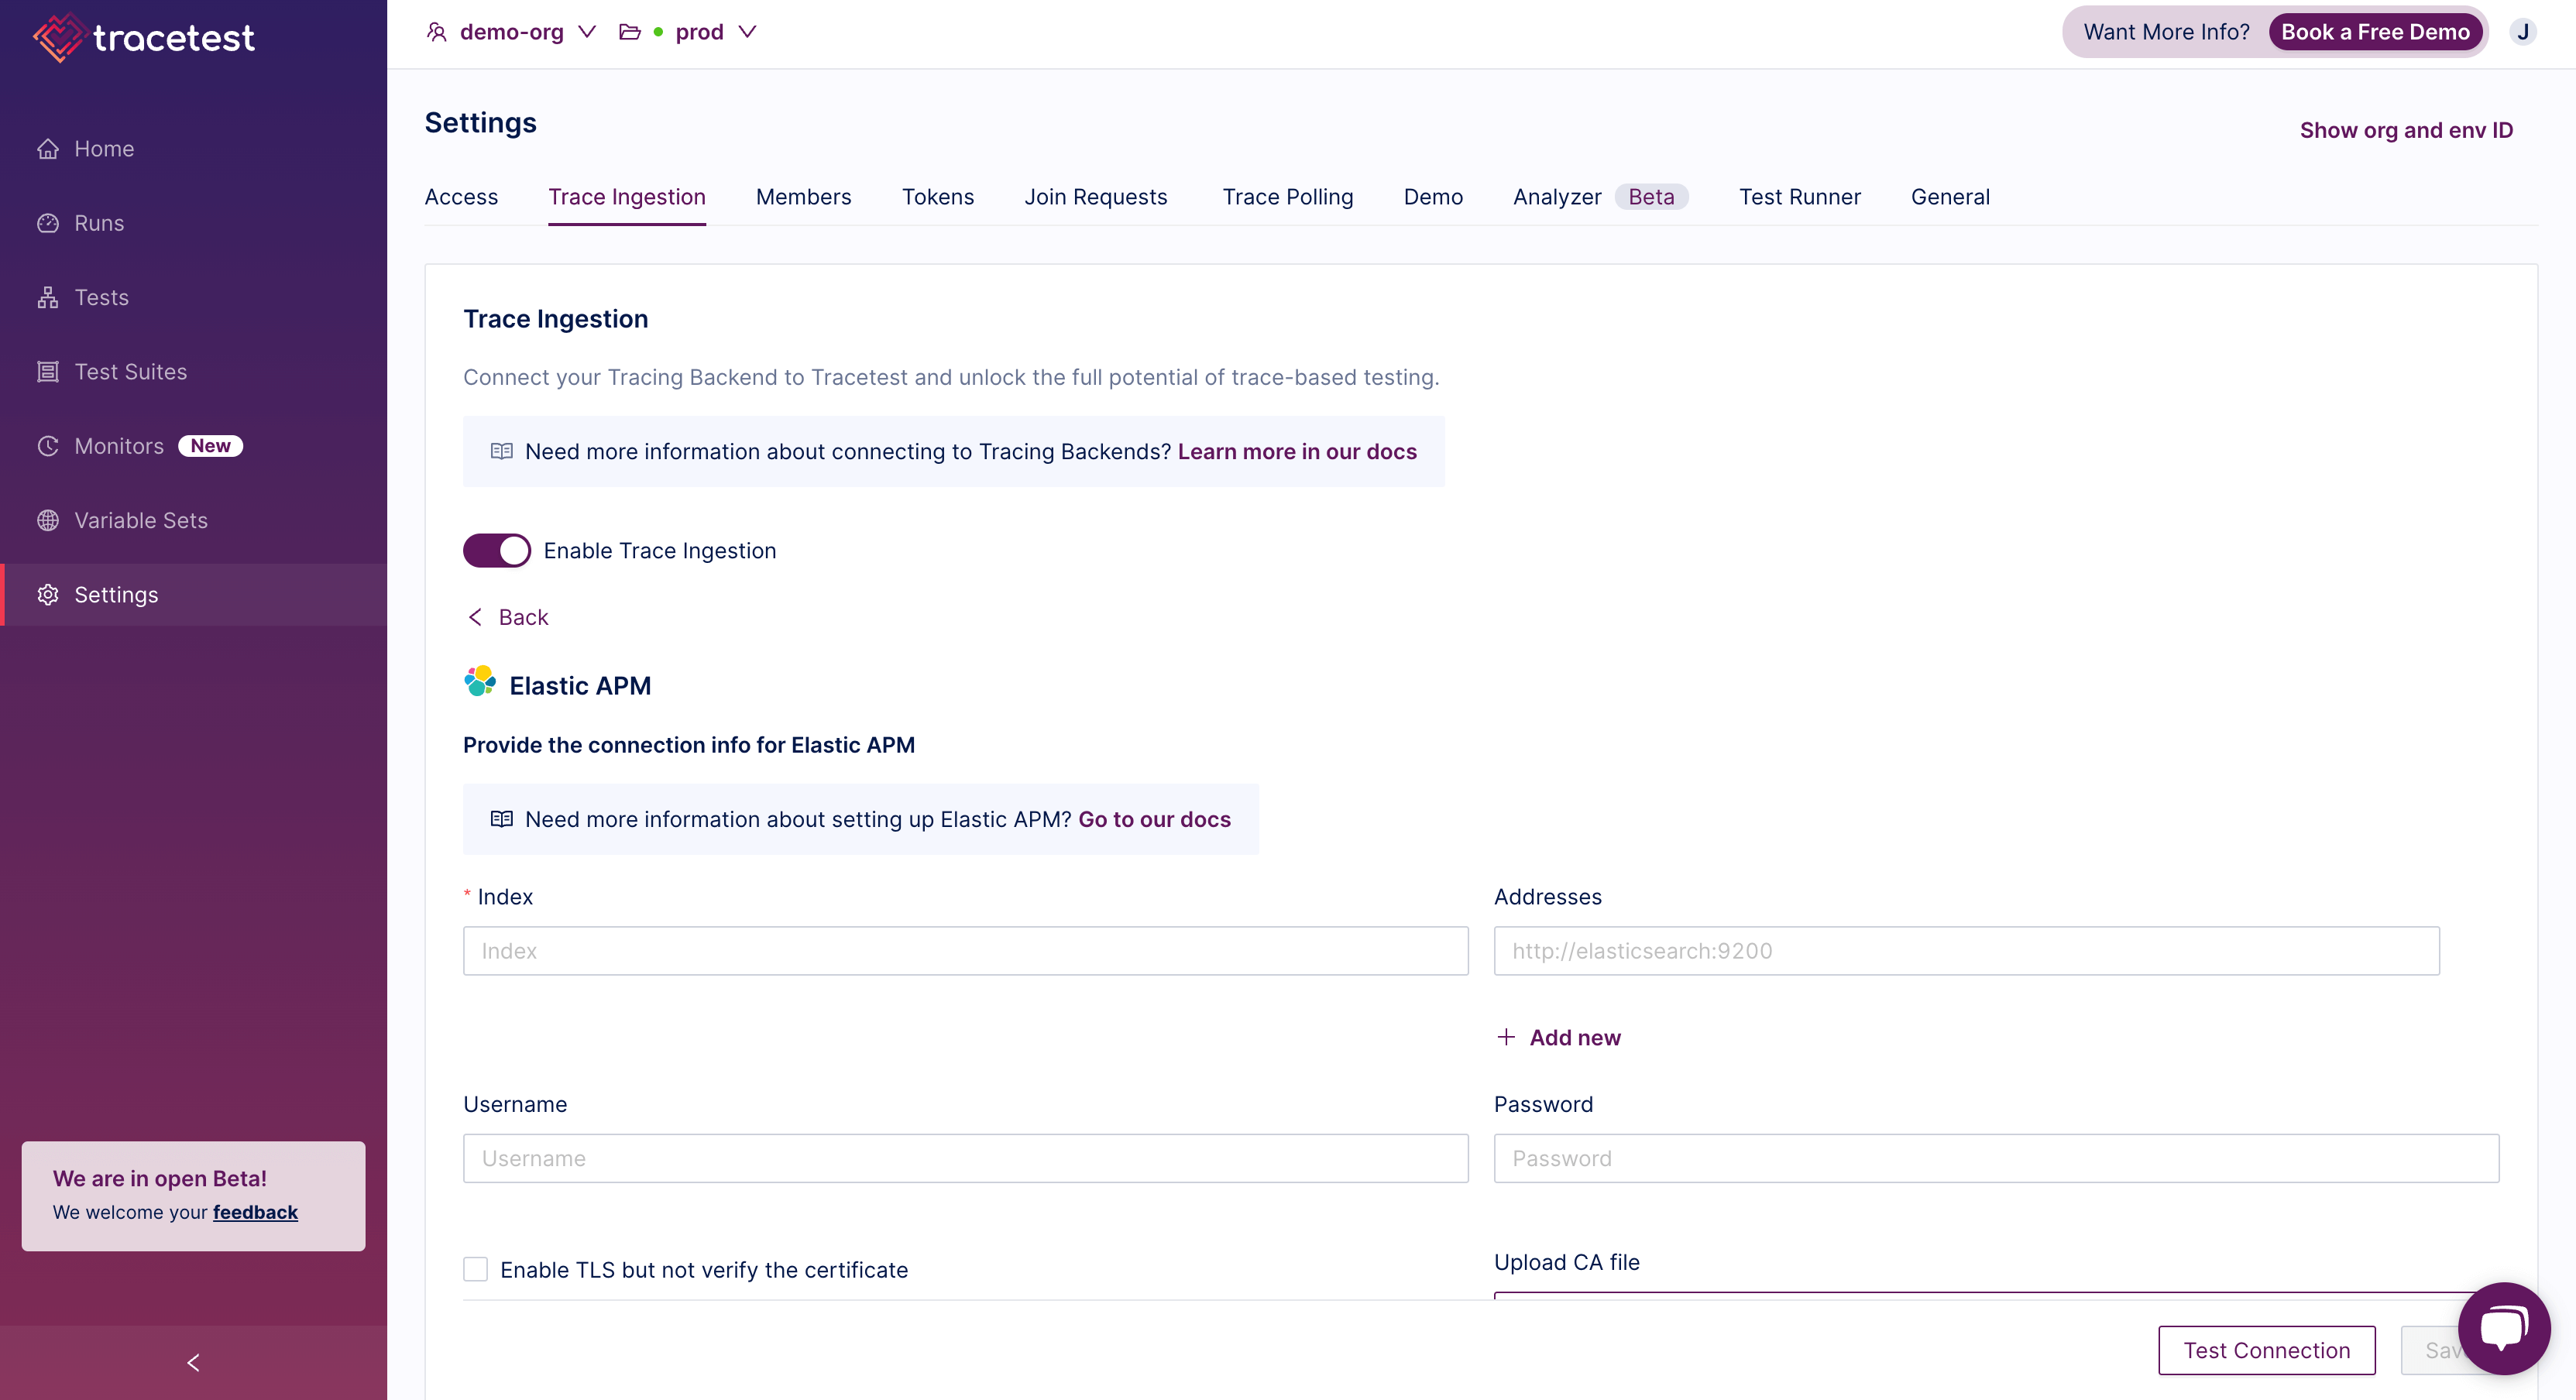
You need to know which Index name, Address, and credentials you are using.
The defaults can be:
- Index name:
traces-apm-default - Address:
https://es01:9200 - Username:
elastic - Password:
changeme
To configure Elastic APM you will need to download the CA certificate from the Docker image and upload it to the config under "Upload CA file".
- The command to download the
ca.crtfile is:docker cp tracetest-elasticapm-with-elastic-agent-es01-1:/usr/share/elasticsearch/config/certs/ca/ca.crt . - Alternatively, you can skip CA certificate validation by setting the
Enable TLS but don't verify the certificateoption.
Need help configuring the OpenTelemetry Collector so send trace data from your application to Elastic? Read more in the reference page here.
Connect Tracetest to Elastic with the Web UI
In the Web UI, (1) open Settings and, on the (2) Trace Ingestion tab, select (3) Elastic APM. If you are using Docker, as in the screenshot below, use the service name as the hostname with port 9200. Use http, or https if TLS is enabled.
https://es01:9200
Connect Tracetest to Elastic with the CLI
Or, if you prefer using the CLI, you can use this file config.
type: DataStore
spec:
  name: Elastic Data Store
  type: elasticapm
  default: true
  elasticapm:
    addresses:
      - https://es01:9200
    username: elastic
    password: changeme
    index: traces-apm-default
    insecureSkipVerify: true
Proceed to run this command in the terminal and specify the file above.
tracetest apply datastore -f my/data-store/file/location.yaml