Trace-Based End to End Testing with Cypress and Tracetest
Find out the requirements for your instrumented app to start using Tracetest x Cypress.
Tracetest is a testing tool based on OpenTelemetry that permits you to test your distributed application. It allows you to use the trace data generated by your OpenTelemetry tools to check and assert if your application has the desired behavior defined by your test definitions.
Cypress is a JavaScript end-to-end testing framework. It is used for testing web applications by simulating user interactions within the browser. Cypress provides a fast, reliable, and easy-to-use testing environment for developers.
Why is this important?
Cypress is currently one of the top end to end testing frameworks, it is a great tool in its own right that allows you to replicate most of the production challenges you might encounter by allowing developers to test the system from the user perspective. But, as with all of the tools that only test the UI portion application, you can only run validations against what the user would see while going through the flows.
Check out the hands-on tutorial on YouTube!
How It Works
The following is a high-level sequence diagram of how Cypress and Tracetest interact with the different pieces of the system.
The @tracetest/cypress npm Package
The @tracetest/cypress npm package is a Cypress plugin that allows you to run Trace-based testing using Tracetest and Cypress. It is a wrapper around the Tracetest API that allows you to configure, orchestrate and run tests from Cypress.
Requirements
Tracetest Account:
- Sign up to
app.tracetest.ioor follow the get started docs. - Create an environment.
- Create an environment token.
- Have access to the environment's agent API key.
Docker:
- Have Docker and Docker Compose installed on your machine.
Run This Quckstart Example
Clone the official Tracetest Pokeshop Demo App Repo to your local machine.
git clone https://github.com/kubeshop/pokeshop.git
cd pokeshop
Follow these instructions to run the Cypress example:
- Copy the
.env.templatefile to.env. - Log into the Tracetest app.
- This example is configured to use the OpenTelemetry Collector. Ensure the environment you will be utilizing to run this example is also configured to use the OpenTelemetry Tracing Backend by clicking on Settings, Tracing Backend, OpenTelemetry, Save.
- Fill out the token and agent API key details by editing your
.envfile. You can find these values in the Settings area for your environment. - Run
docker compose -f docker-compose.yml -f docker-compose.e2e.yml up -d. - Run
npm iin the root folder to install the dependencies. - Run
npm run cy:runornpm run cy:open.
Follow along with the sections below for an in detail breakdown of what the example you just ran did and how it works.
Project Structure
The project is built with Docker Compose.
Pokeshop Demo App
The Pokeshop Demo App is a complete example of a distributed application using different backend and front-end services, implementation code is written in Typescript.
The docker-compose.yml file in the root directory is for the Pokeshop Demo app and the OpenTelemetry setup.
And the docker-compose.e2e.yml includes the Tracetest Agent.
Finally, the Cypress end-to-end tests can be found in cypress/e2e/1-getting-started.
The Cypress Setup
The Cypress setup is generated by installing Cypress locally and configuring it from the UI after running cypress open.
The configuration script file is cypress.config.ts looks like this:
import { defineConfig } from "cypress";
import { config } from "dotenv"; // loads the environment variables

config();

module.exports = defineConfig({
  chromeWebSecurity: false,
  e2e: {
    baseUrl: process.env.POKESHOP_DEMO_URL || "http://localhost:3000",
    env: {
      TRACETEST_API_TOKEN: process.env.TRACETEST_API_TOKEN, // used to authenticate with Tracetest
    },
    setupNodeEvents() {
      // implement node event listeners here
    },
  },
});
The home.cy.ts Test Script
The cypress/e2e/1-getting-started/home.cy.ts test script contains three different tests based on the Pokeshop Demo UI fetures, which are:
- Create a Pokemon
- Import a Pokemon (using an async process)
- Delete a Pokemon
Tracetest Library Setup
If you go to the package.json file you will find the inclusion of a Tracetest package for Cypress @tracetest/cypress.
The first thing the test script does is import the package, grab the Tracetest API token from the environment variables and create the Tracetest instance.
import Tracetest, { Types } from "@tracetest/cypress";

const TRACETEST_API_TOKEN = Cypress.env("TRACETEST_API_TOKEN") || "";
let tracetest: Types.TracetestCypress | undefined = undefined;
Afterward, during the before hook, create the Tracetest instance with the API token.
before((done) => {
  Tracetest({ apiToken: TRACETEST_API_TOKEN }).then((instance) => {
    tracetest = instance;

    // optional, set the definition files and run info for the tests
    tracetest
      .setOptions({
        "imports a pokemon": {
          definition,
        },
      })
      .then(() => done());
  });
});
Then, during the beforeEach hook, the script captures the document to inject the traceparent to the meta tag.
beforeEach(() => {
  cy.visit("/", {
    onBeforeLoad: (win) => tracetest.capture(win.document),
  });
});
OPTIONAL: If you want to wait for the test to finish and break the Cypress execution based on a failed Tracetest test, you can add the after hook and call the summary method.
after((done) => {
  tracetest.summary().then(() => done());
});
The rest of the test script is the Cypress test definitions for the test cases mentioned above. The complete test script looks like this:
import Tracetest, { Types } from '@tracetest/cypress';

const TRACETEST_API_TOKEN = Cypress.env('TRACETEST_API_TOKEN') || '';
let tracetest: Types.TracetestCypress | undefined = undefined;

const definition = `
  type: Test
  spec:
    id: aW1wb3J0cyBhIHBva2Vtb24=
    name: imports a pokemon
    trigger:
      type: cypress
    specs:
    - selector: span[tracetest.span.type="http"] span[tracetest.span.type="http"]
      name: "All HTTP Spans: Status  code is 200"
      assertions:
      - attr:http.status_code   =   200
    - selector: span[tracetest.span.type="database"]
      name: "All Database Spans: Processing time is less than 100ms"
      assertions:
      - attr:tracetest.span.duration < 2s
    outputs:
    - name: MY_OUTPUT
      selector: span[tracetest.span.type="general" name="Tracetest trigger"]
      value: attr:name
    `;

describe('Home', { defaultCommandTimeout: 60000 }, () => {
  before(done => {
    Tracetest({ apiToken: TRACETEST_API_TOKEN }).then(instance => {
      tracetest = instance;
      tracetest
        .setOptions({
          'imports a pokemon': {
            definition,
          },
        })
        .then(() => done());
    });
  });

  beforeEach(() => {
    cy.visit('/', {
      onBeforeLoad: win => tracetest.capture(win.document),
    });
  });

  // uncomment to wait for trace tests to be done
  after(done => {
    tracetest.summary().then(() => done());
  });

  it('create a pokemon', () => {
    cy.get('[data-cy="create-pokemon-button"]').should('be.visible').click();
    cy.get('[data-cy="create-pokemon-modal"]').should('be.visible');
    cy.get('#name').type('Pikachu');
    cy.get('#type').type('Electric');
    cy.get('#imageUrl').type('https://oyster.ignimgs.com/mediawiki/apis.ign.com/pokemon-blue-version/8/89/Pikachu.jpg');

    cy.get('button').contains('OK').click();
  });

  it('imports a pokemon', () => {
    cy.get('[data-cy="import-pokemon-button"]').click();
    cy.get('[data-cy="import-pokemon-form"]').should('be.visible');

    cy.get('[id="id"]')
      .last()
      .type(Math.floor(Math.random() * 101).toString());
    cy.get('button').contains('OK').click({ force: true });
  });

  it('deletes a pokemon', () => {
    cy.get('[data-cy="pokemon-list"]').should('be.visible');
    cy.get('[data-cy="pokemon-card"]').first().click().get('[data-cy="delete-pokemon-button"]').first().click();
  });
});
Setting the Environment Variables
Copy the .env.template content into a new .env file.
cp .env.template .env
Add the Tracetest API Token and Tracetest Agent API Key to the TRACETEST_API_TOKEN and TRACETEST_AGENT_API_KEY variables.
TRACETEST_API_TOKEN=<YOUR_API_TOKEN>
TRACETEST_AGENT_API_KEY=<YOUR_AGENT_API_KEY>
POKESHOP_DEMO_URL=http://localhost:8081
Starting the Pokeshop Demo App
To start the Pokeshop Demo App, run the following command from the root directory:
docker compose -f docker-compose.yml -f docker-compose.e2e.yml up
Running the Tests
Next, you can run the tests by using both the Cypress CLI and the Cypress UI.
Using the Cypress CLI
To run the tests using the Cypress CLI, run the following command from the root directory:
npm run cy:run
You should see the following output:
> pokeshop@1.0.0 cy:run
> cypress run
DevTools listening on ws://127.0.0.1:54740/devtools/browser/8c9d2503-cbaa-4ef2-b716-5bc1ad6cf6c8
Missing baseUrl in compilerOptions. tsconfig-paths will be skipped
====================================================================================================
(Run Starting)
┌────────────────────────────────────────────────────────────────────────────────────────────────┐
│ Cypress: 13.6.1 │
│ Browser: Electron 114 (headless) │
│ Node Version: v16.15.1 (/Users/oscarr.reyesgaucin/.nvm/versions/node/v16.15.1/bin/node) │
│ │
│ Specs: 1 found (home.cy.ts) │
│ Searched: cypress/e2e/**/*.cy.{js,jsx,ts,tsx} │
└────────────────────────────────────────────────────────────────────────────────────────────────┘
────────────────────────────────────────────────────────────────────────────────────────────────────
Running: home.cy.ts (1 of 1)
Home
✓ create a pokemon (4108ms)
✓ imports a pokemon (756ms)
✓ deletes a pokemon (2) (653ms)
3 passing (42s)
(Results)
┌────────────────────────────────────────────────────────────────────────────────────────────────┐
│ Tests: 3 │
│ Passing: 3 │
│ Failing: 0 │
│ Pending: 0 │
│ Skipped: 0 │
│ Screenshots: 0 │
│ Video: false │
│ Duration: 41 seconds │
│ Spec Ran: home.cy.ts │
└────────────────────────────────────────────────────────────────────────────────────────────────��┘
====================================================================================================
(Run Finished)
Spec Tests Passing Failing Pending Skipped
┌────────────────────────────────────────────────────────────────────────────────────────────────┐
│ ✔ home.cy.ts 00:41 3 3 - - - │
└────────────────────────────────────────────────────────────────────────────────────────────────┘
✔ All specs passed! 00:41 3 3 - - -
Using the Cypress UI
To run the tests using the Cypress UI, run the following command from the root directory:
npm run cy:open
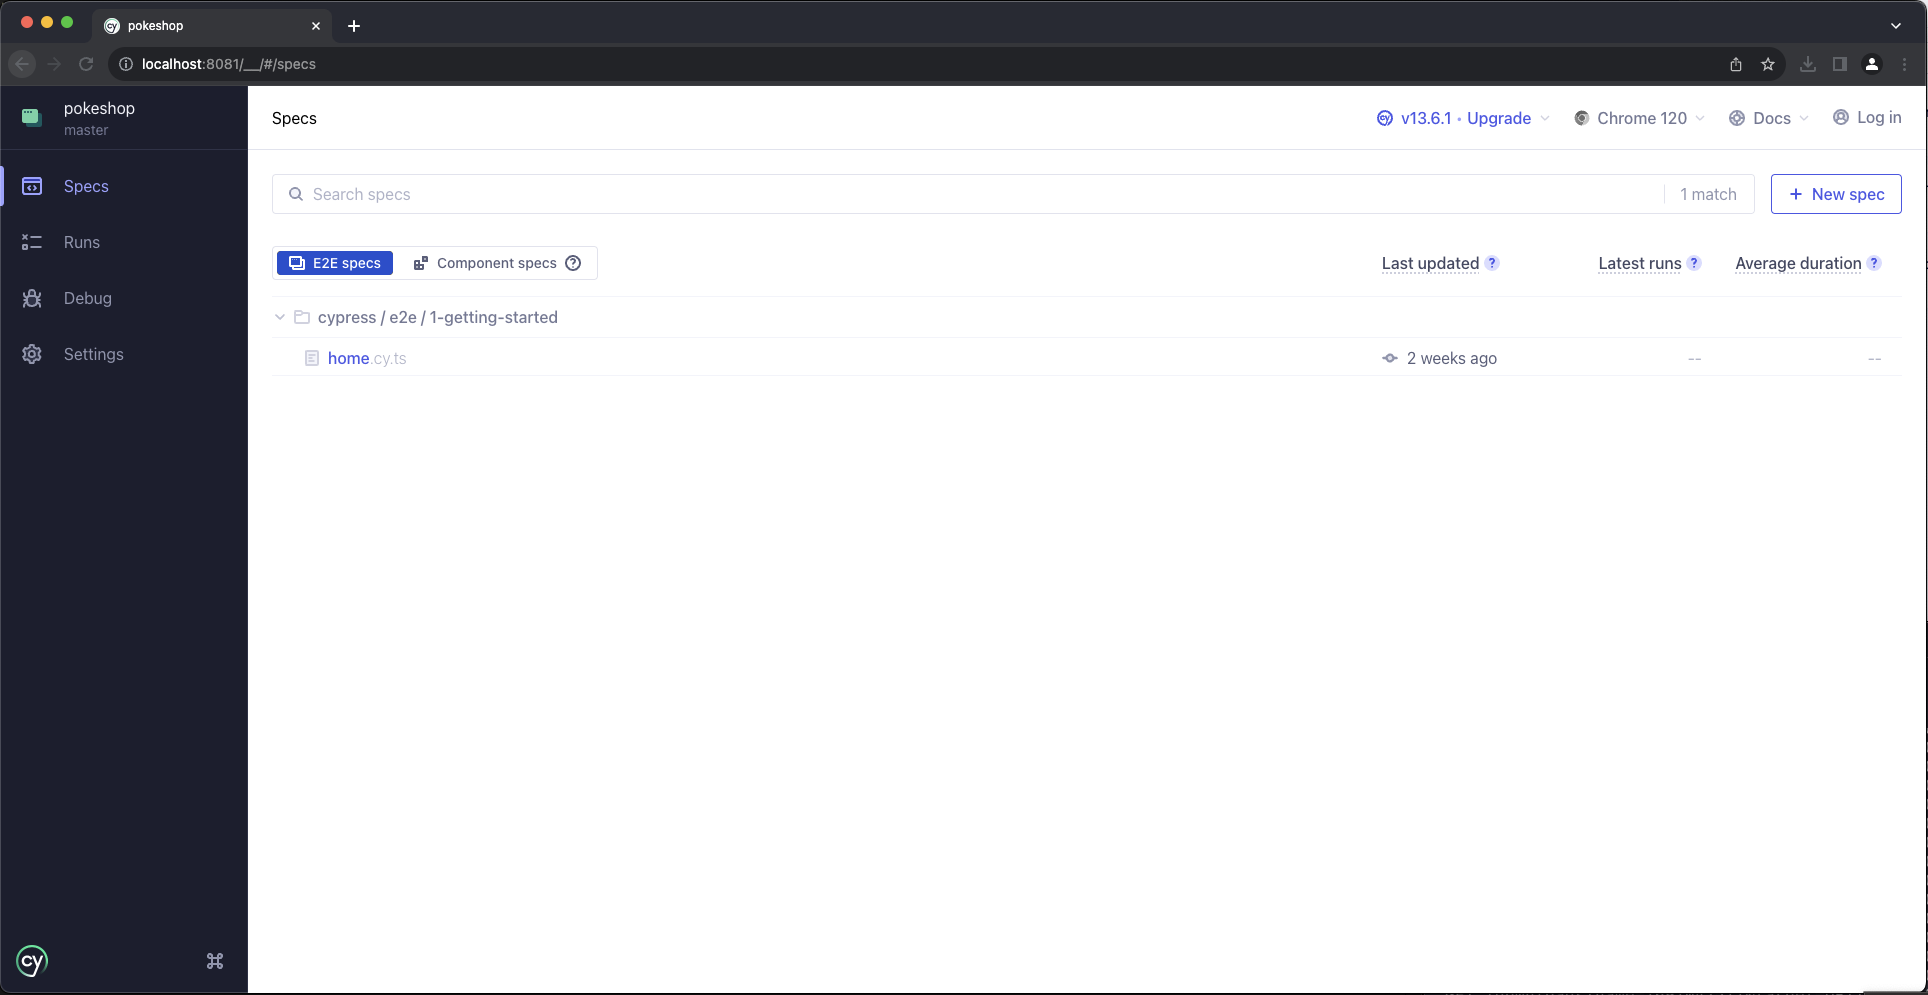
Then, navigate your way to the e2e section and select the home.cy.ts test script.

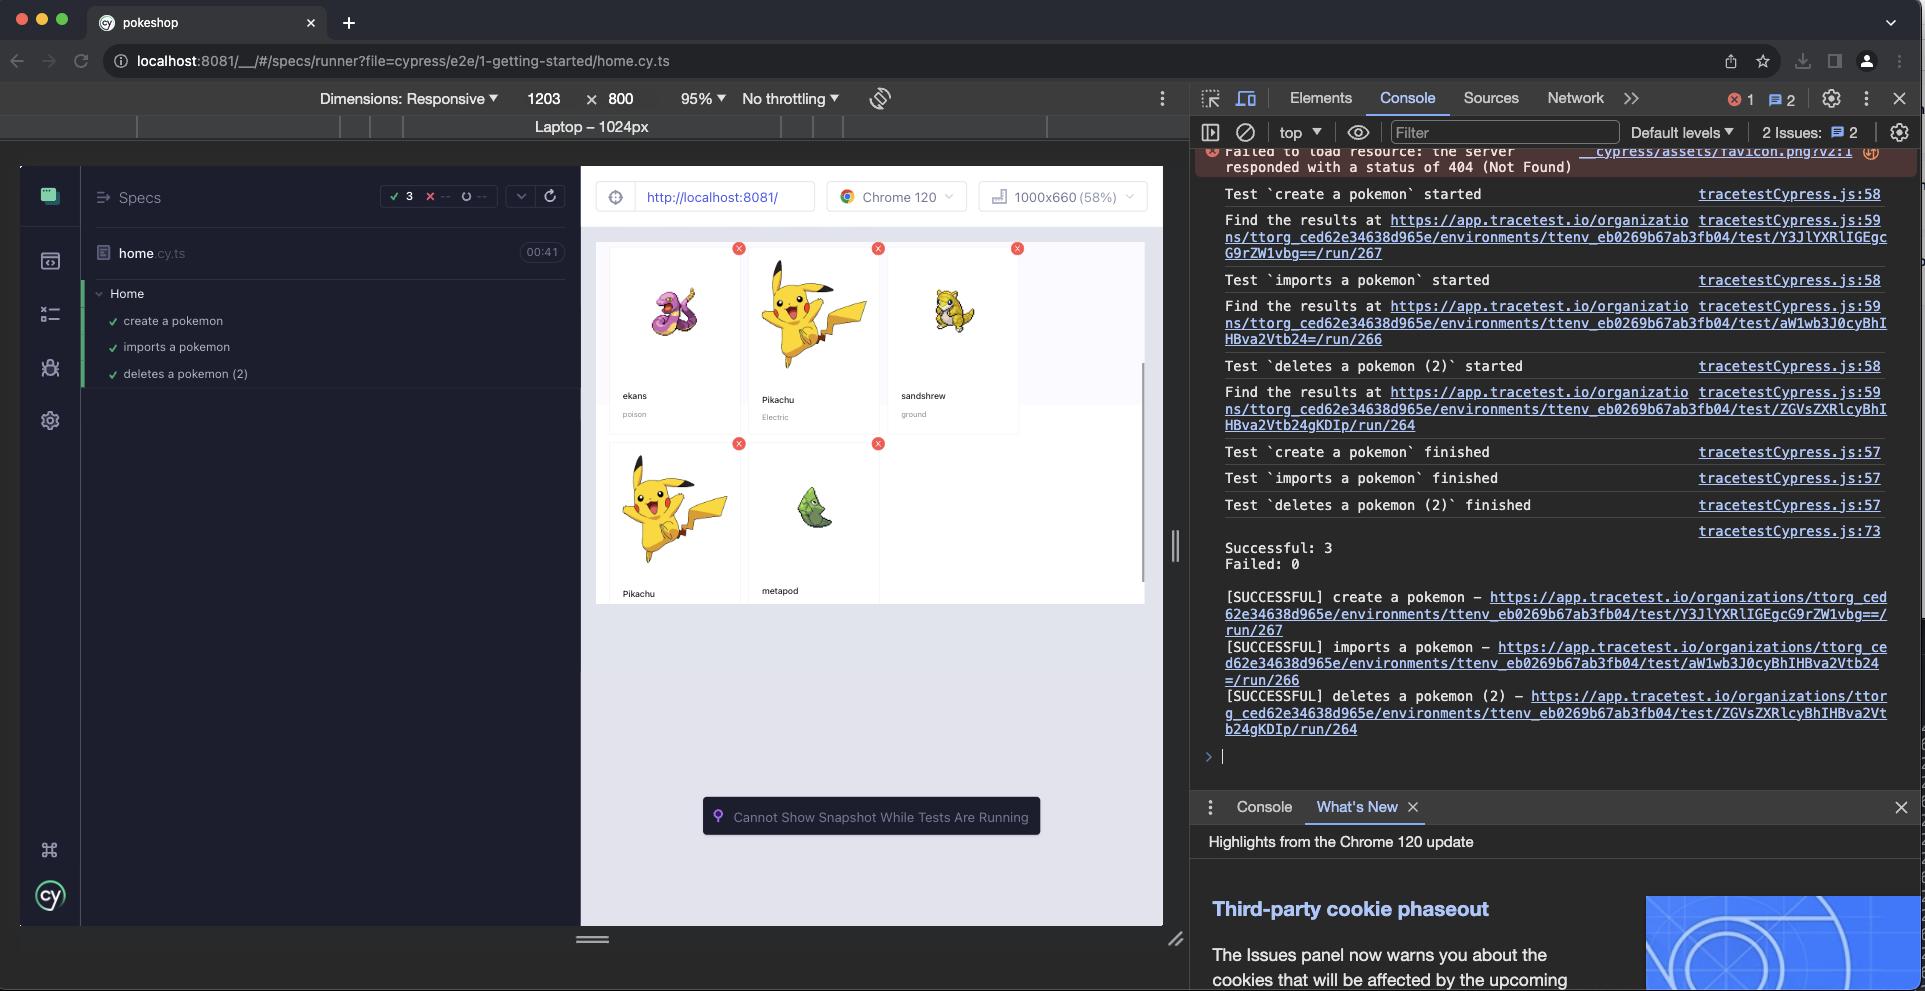
You should see the three tests running and passing. And by looking at the browser console log you can find the statuses and results of the tests.

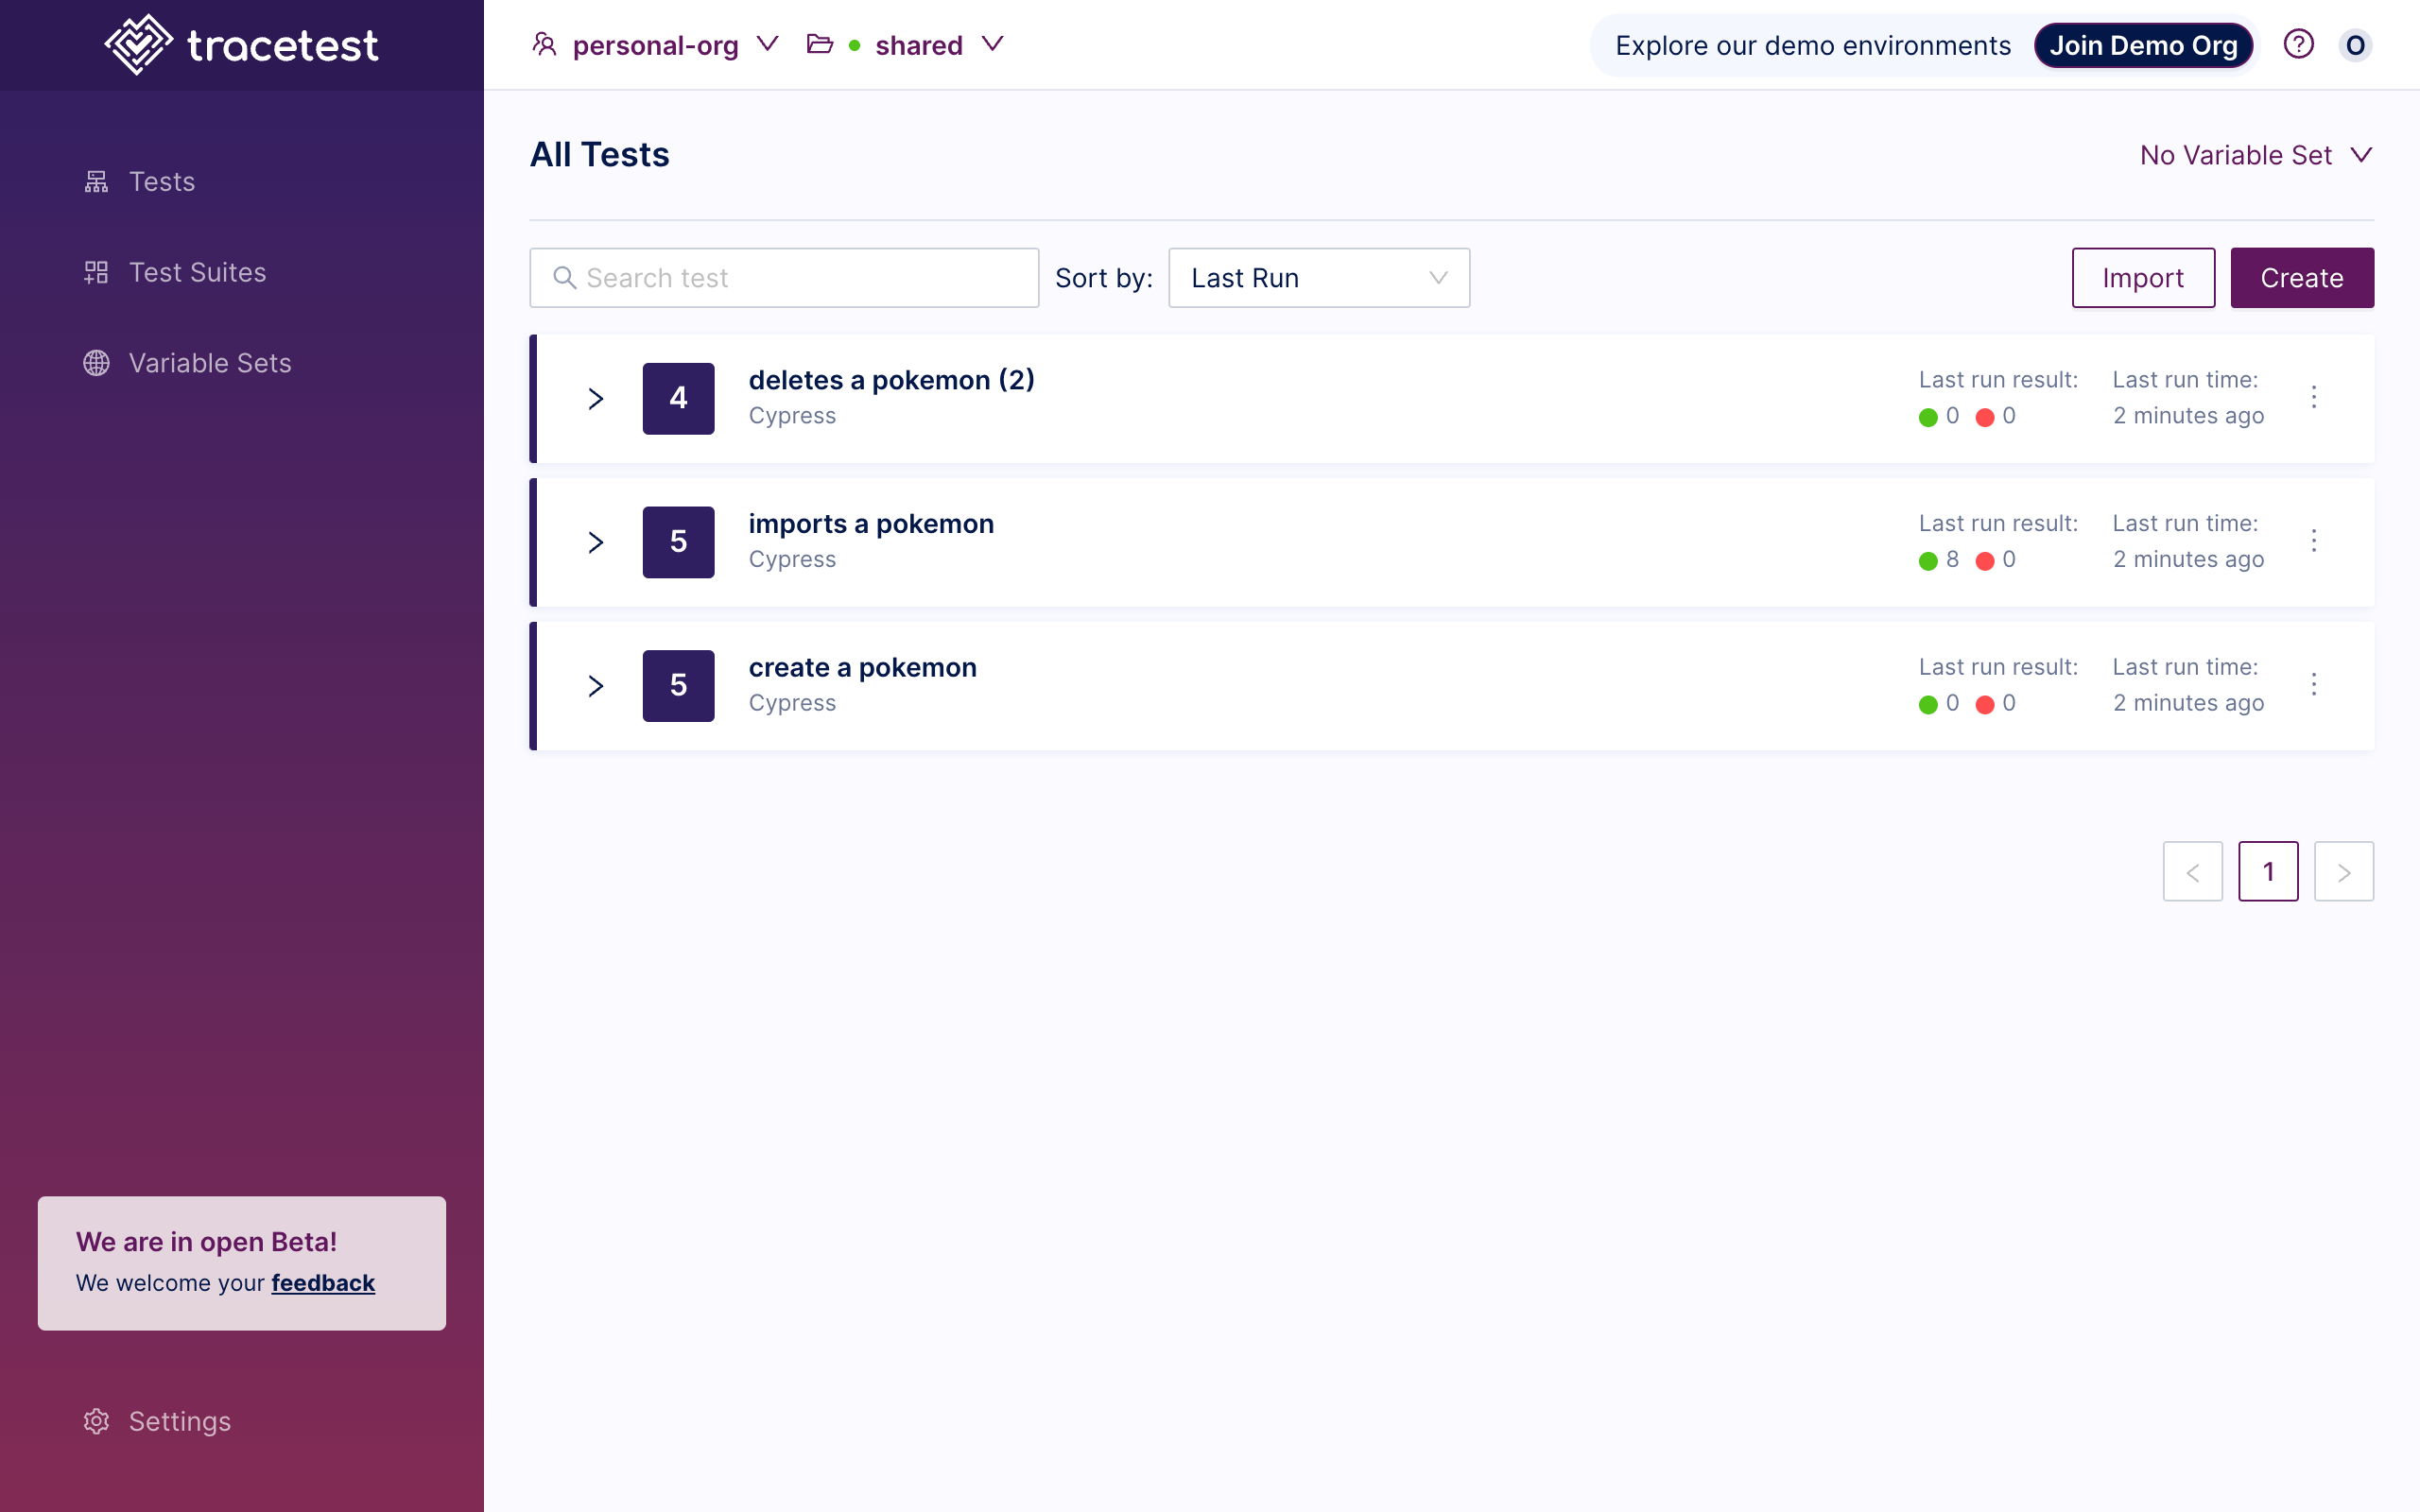
Then, you can follow any of the result links in the console log to the Tracetest App and see the results of the tests.
The Tracetest library uses the spec name for the trace-based tests. That way you can identify them more easily and it also fills some of the metadata directly from the Cypress execution.

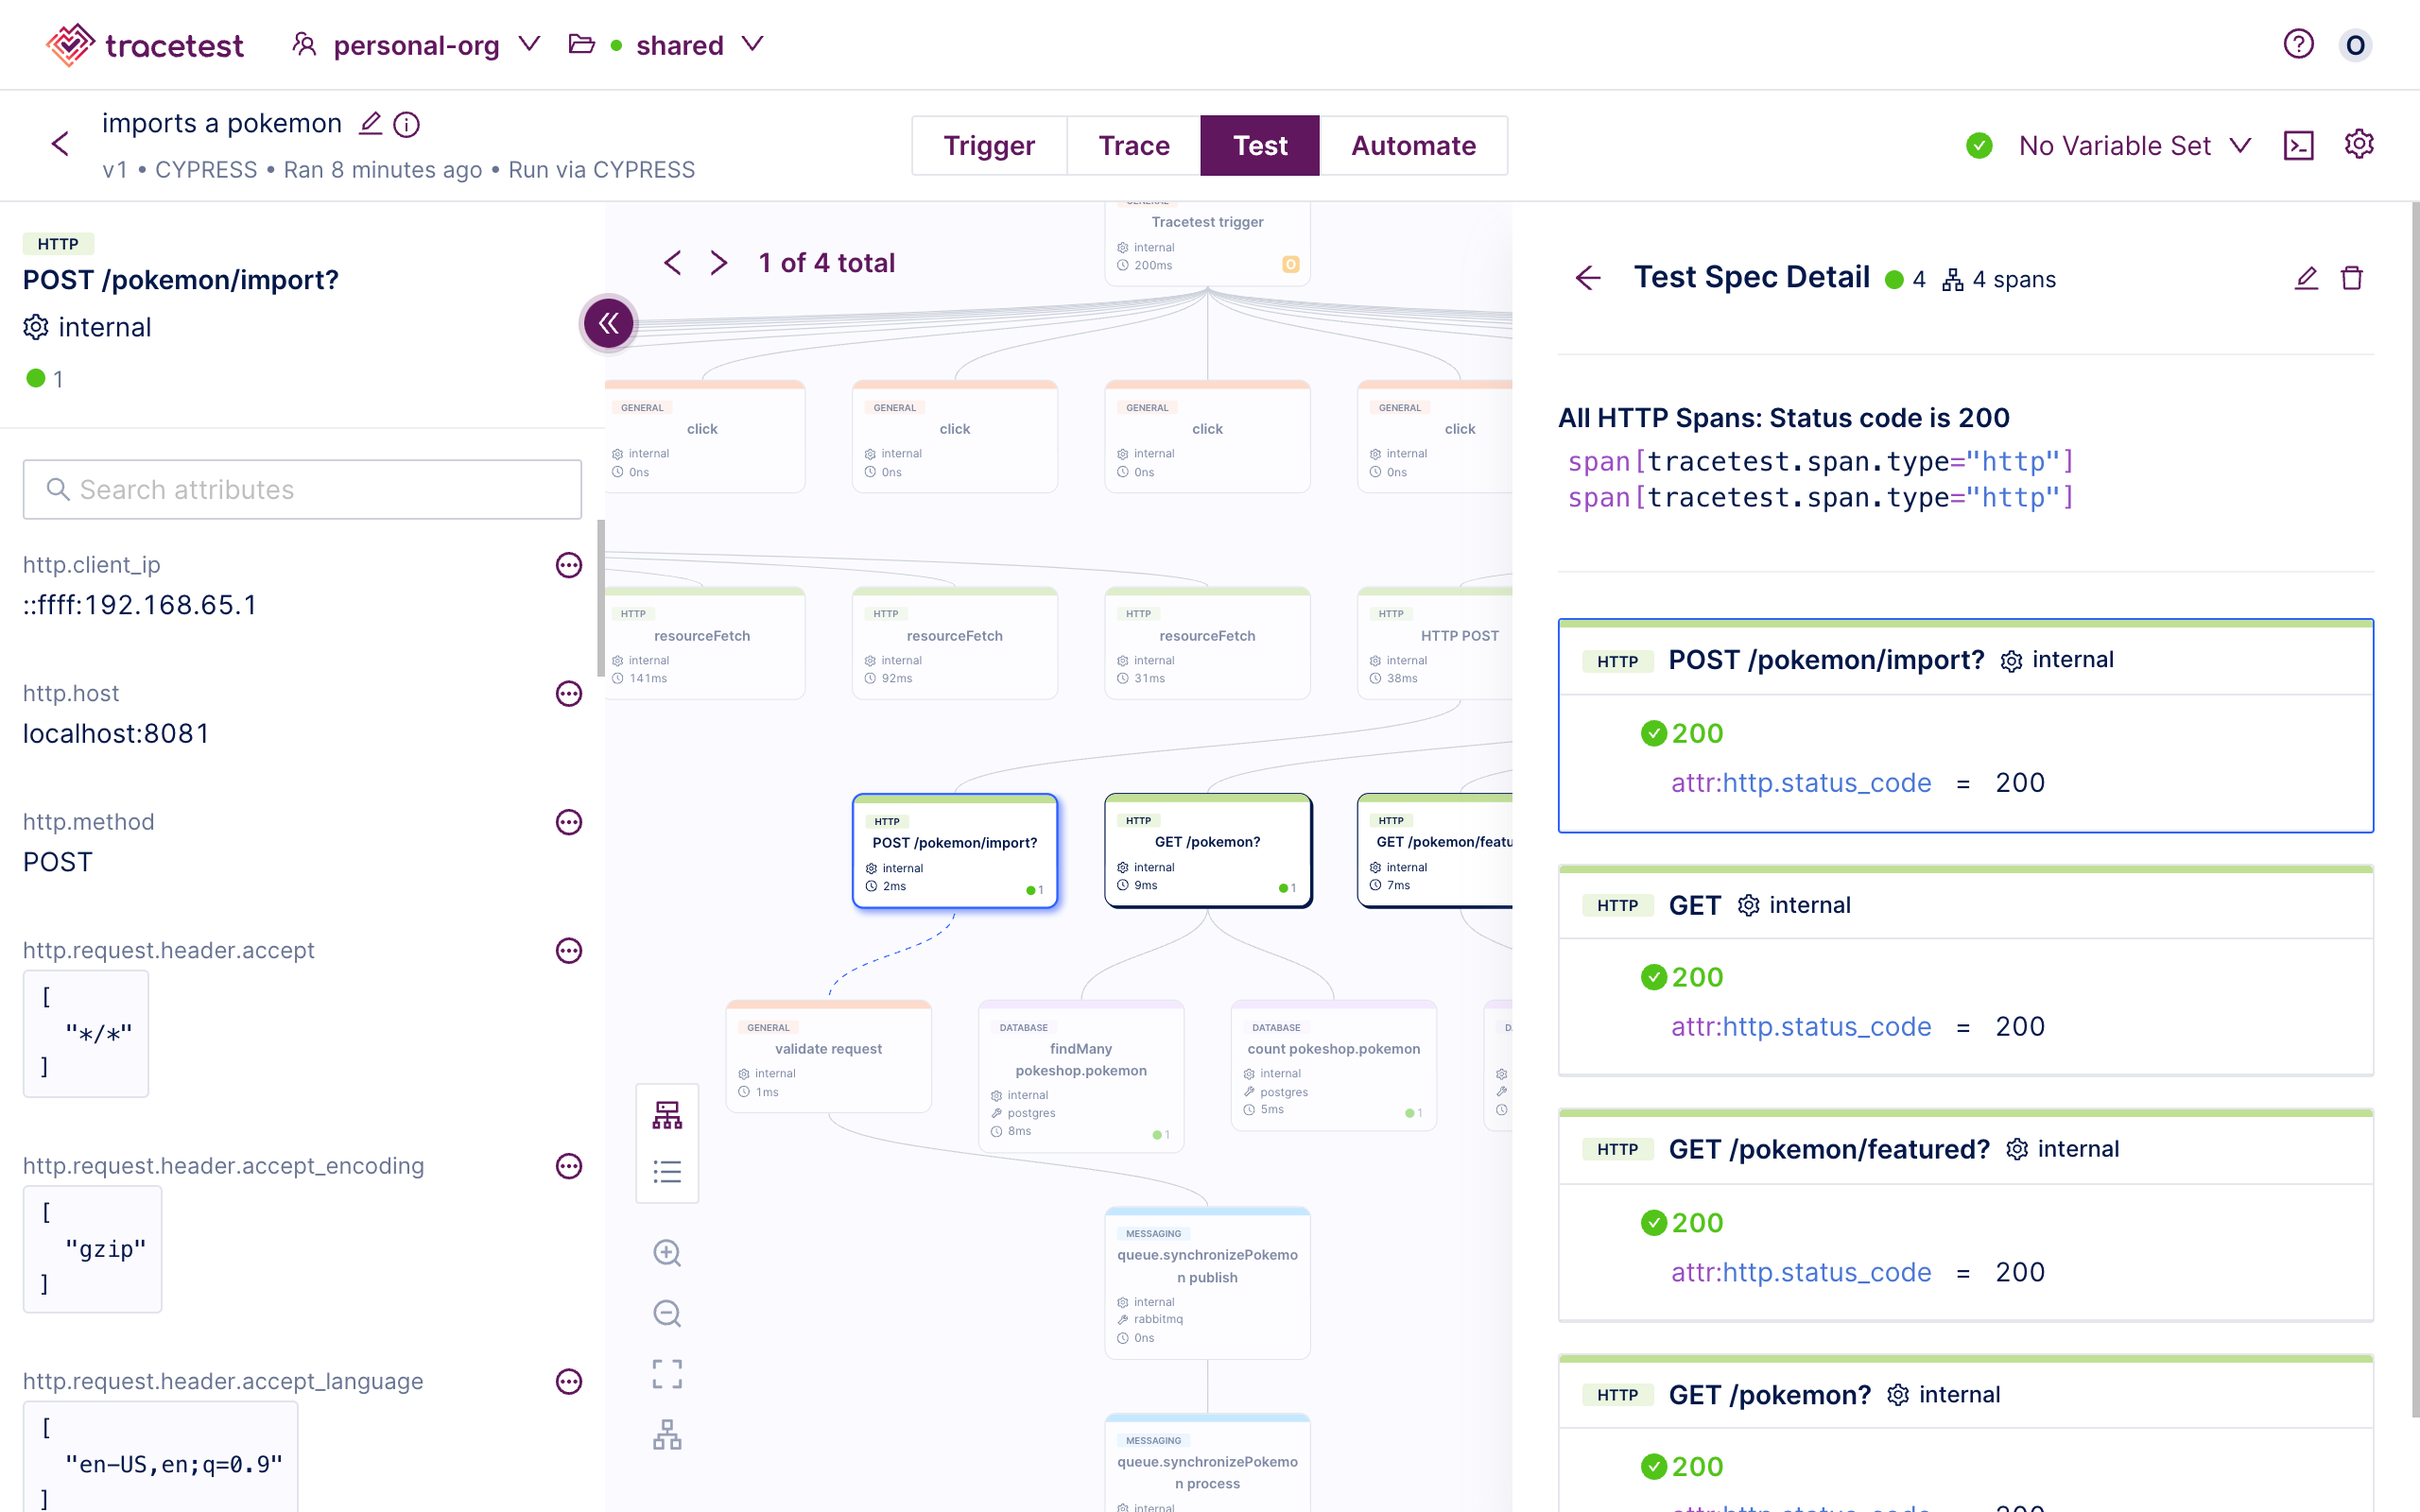
Lastly, you can now create assertions based on the trace data that was captured from the browser to the backend services.
Starting with the click events and the fetch request from the client side, to the HTTP requests and database queries from the backend services, including async processes like the one showcased during the import pokemon test.
