Create a Trace-based Test
So far, you've learned:
- How to define a trigger to executes tests against your apps.
- How to configure trace ingestion.
- How to configure your application to export traces.
This will enable trace-based testing in your apps that have OpenTelemetry distributed tracing configured.
We've provided a sample application with OpenTelemetry already enabled for you to try.
Start the Sample Pokeshop API
To create tests quickly, start the official sample called Pokeshop API.
- Tracetest CLI
- Docker
- Docker Compose
- Kubernetes
- Helm
git clone --depth 1 https://github.com/kubeshop/tracetest.git
cd tracetest/examples/tracetest-agent/pokeshop/

docker compose up -d --build
https://app.tracetest.io/- Access the Tracetest Web UI. Sign up and create an organization.http://localhost:8081- The Pokeshop API demo is exposed from Docker tolocalhoston this port.http://localhost:8081- To run tests you will uselocalhostsince it is exposed from Docker.http://localhost:4317- Trace ingestion URL where Tracetest Agent will accept traces. Since Pokeshop is running in Docker and Tracetest Agent is running onlocalhostthis sample useshttp://host.docker.internal:4317to ingest traces instead ofhttp://localhost:4317.
git clone --depth 1 https://github.com/kubeshop/pokeshop.git
cd pokeshop

docker compose up -d --build
https://app.tracetest.io/- Access the Tracetest Web UI. Sign up and create an organization.http://localhost:8081- The Pokeshop API demo is exposed from Docker tolocalhoston this port.http://api:8081- To run tests you will use the Docker internal network and the service name.http://tracetest-agent:4317- Trace ingestion URL where Tracetest Agent will accept traces.
Docker Networking
Running a test against localhost will resolve as 127.0.0.1 inside the Tracetest Agent container.
Add Tracetest Agent to the same network and use service name mapping. Example: Instead of running an app on localhost:8080, add it to your Docker Compose file, connect it to the same network as your Tracetest Agent service, and use <service-name>:8080 in the URL field when creating a test.
You can reach services running on your local machine using:
- Linux (Docker version < 20.10.0):
172.17.0.1:8080 - MacOS (Docker version >= 18.03) and Linux (Docker version >= 20.10.0):
host.docker.internal:8080
git clone --depth 1 https://github.com/kubeshop/pokeshop.git
cd pokeshop/k8s

kubectl apply -f .
To access the Pokeshop API run a port-forward:
kubectl port-forward svc/api 8081:8081
https://app.tracetest.io/- Access the Tracetest Web UI. Sign up and create an organization.http://localhost:8081- The Pokeshop API demo is port forwarded from Kubernetes tolocalhoston this port.http://api.default.svc.cluster.local:8081- To run tests you will use the Kubernetes internal network and the service name.http://tracetest-agent.default.svc.cluster.local:4317- Trace ingestion URL where Tracetest Agent will accept traces.
Kubernetes Networking
Make sure to use the correct <service-name> if you edit the Tracetest Agent service name.
Running a test against localhost will resolve as 127.0.0.1 inside the Tracetest Agent container.
Make sure to run tests using the internal Kubernetes service networking eg: http://<your-app-service-name>.default.svc.cluster.local:port.
git clone --depth 1 https://github.com/kubeshop/pokeshop.git
cd pokeshop/helm-charts

helm dependency update
helm install -f values.yaml --create-namespace pokeshop .
To access the Pokeshop API run a port-forward:
kubectl port-forward svc/pokeshop-pokemon-api 8081:8081
https://app.tracetest.io/- Access the Tracetest Web UI. Sign up and create an organization.http://localhost:8081- The Pokeshop API demo is port forwarded from Kubernetes tolocalhoston this port.http://pokeshop-pokemon-api:8081- To run tests you will use the Kubernetes internal network and the service name.http://agent-tracetest-agent:4317- Trace ingestion URL where Tracetest Agent will accept traces.
Kubernetes Networking
Make sure to use the correct <service-name> if you edit the Tracetest Agent Helm chart <release-name> name.
Running a test against localhost will resolve as 127.0.0.1 inside the Tracetest Agent container.
Make sure to run tests using the internal Kubernetes service networking eg: http://<your-app-service-name>.default.svc.cluster.local:port.
In the following example you can use: http://pokeshop-pokemon-api:8081.
Click to view the sample Pokeshop API architecture
Here's the Architecture of the Pokeshop Sample App:
- an API that serves client requests,
- a Worker who deals with background processes.
The communication between the API and Worker is made using a RabbitMQ queue, and both services emit telemetry data to OpenTelemetry Collector and communicate with a Postgres database.
Tracetest triggers tests against the Node.js API.
Create Trace-based Tests in Two Ways
- Programmatically, in YAML
- Visually, in the Web UI
Create a Trace-based Test Programatically in YAML
Create a file called import-pokemon.yaml.
- Tracetest CLI
- Docker
- Docker Compose
- Kubernetes
- Helm
type: Test
spec:
  name: Import a Pokemon using API and MQ Worker
  description: Import a Pokemon
  trigger:
    type: http
    httpRequest:
      method: POST
      url: http://localhost:8081/pokemon/import
      body: |
        {
          "id": 143
        }
      headers:
      - key: Content-Type
        value: application/json
type: Test
spec:
  name: Import a Pokemon using API and MQ Worker
  description: Import a Pokemon
  trigger:
    type: http
    httpRequest:
      method: POST
      url: http://api:8081/pokemon/import
      body: |
        {
          "id": 143
        }
      headers:
      - key: Content-Type
        value: application/json
type: Test
spec:
  name: Import a Pokemon using API and MQ Worker
  description: Import a Pokemon
  trigger:
    type: http
    httpRequest:
      method: POST
      url: http://api:8081/pokemon/import
      body: |
        {
          "id": 143
        }
      headers:
      - key: Content-Type
        value: application/json
type: Test
spec:
  name: Import a Pokemon using API and MQ Worker
  description: Import a Pokemon
  trigger:
    type: http
    httpRequest:
      method: POST
      url: http://api.default.svc.cluster.local:8081/pokemon/import
      body: |
        {
          "id": 143
        }
      headers:
      - key: Content-Type
        value: application/json
type: Test
spec:
  name: Import a Pokemon using API and MQ Worker
  description: Import a Pokemon
  trigger:
    type: http
    httpRequest:
      method: POST
      url: http://pokeshop-pokemon-api:8081/pokemon/import
      body: |
        {
          "id": 143
        }
      headers:
      - key: Content-Type
        value: application/json
Run it with the CLI.
tracetest run test -f ./import-pokemon.yaml
Create a Trace-based Test Visually with the Web UI
Create a test in the Web UI by opening your Tracetest account, clicking the Create button, and selecting HTTP.

- Tracetest CLI
- Docker
- Docker Compose
- Kubernetes
- Helm
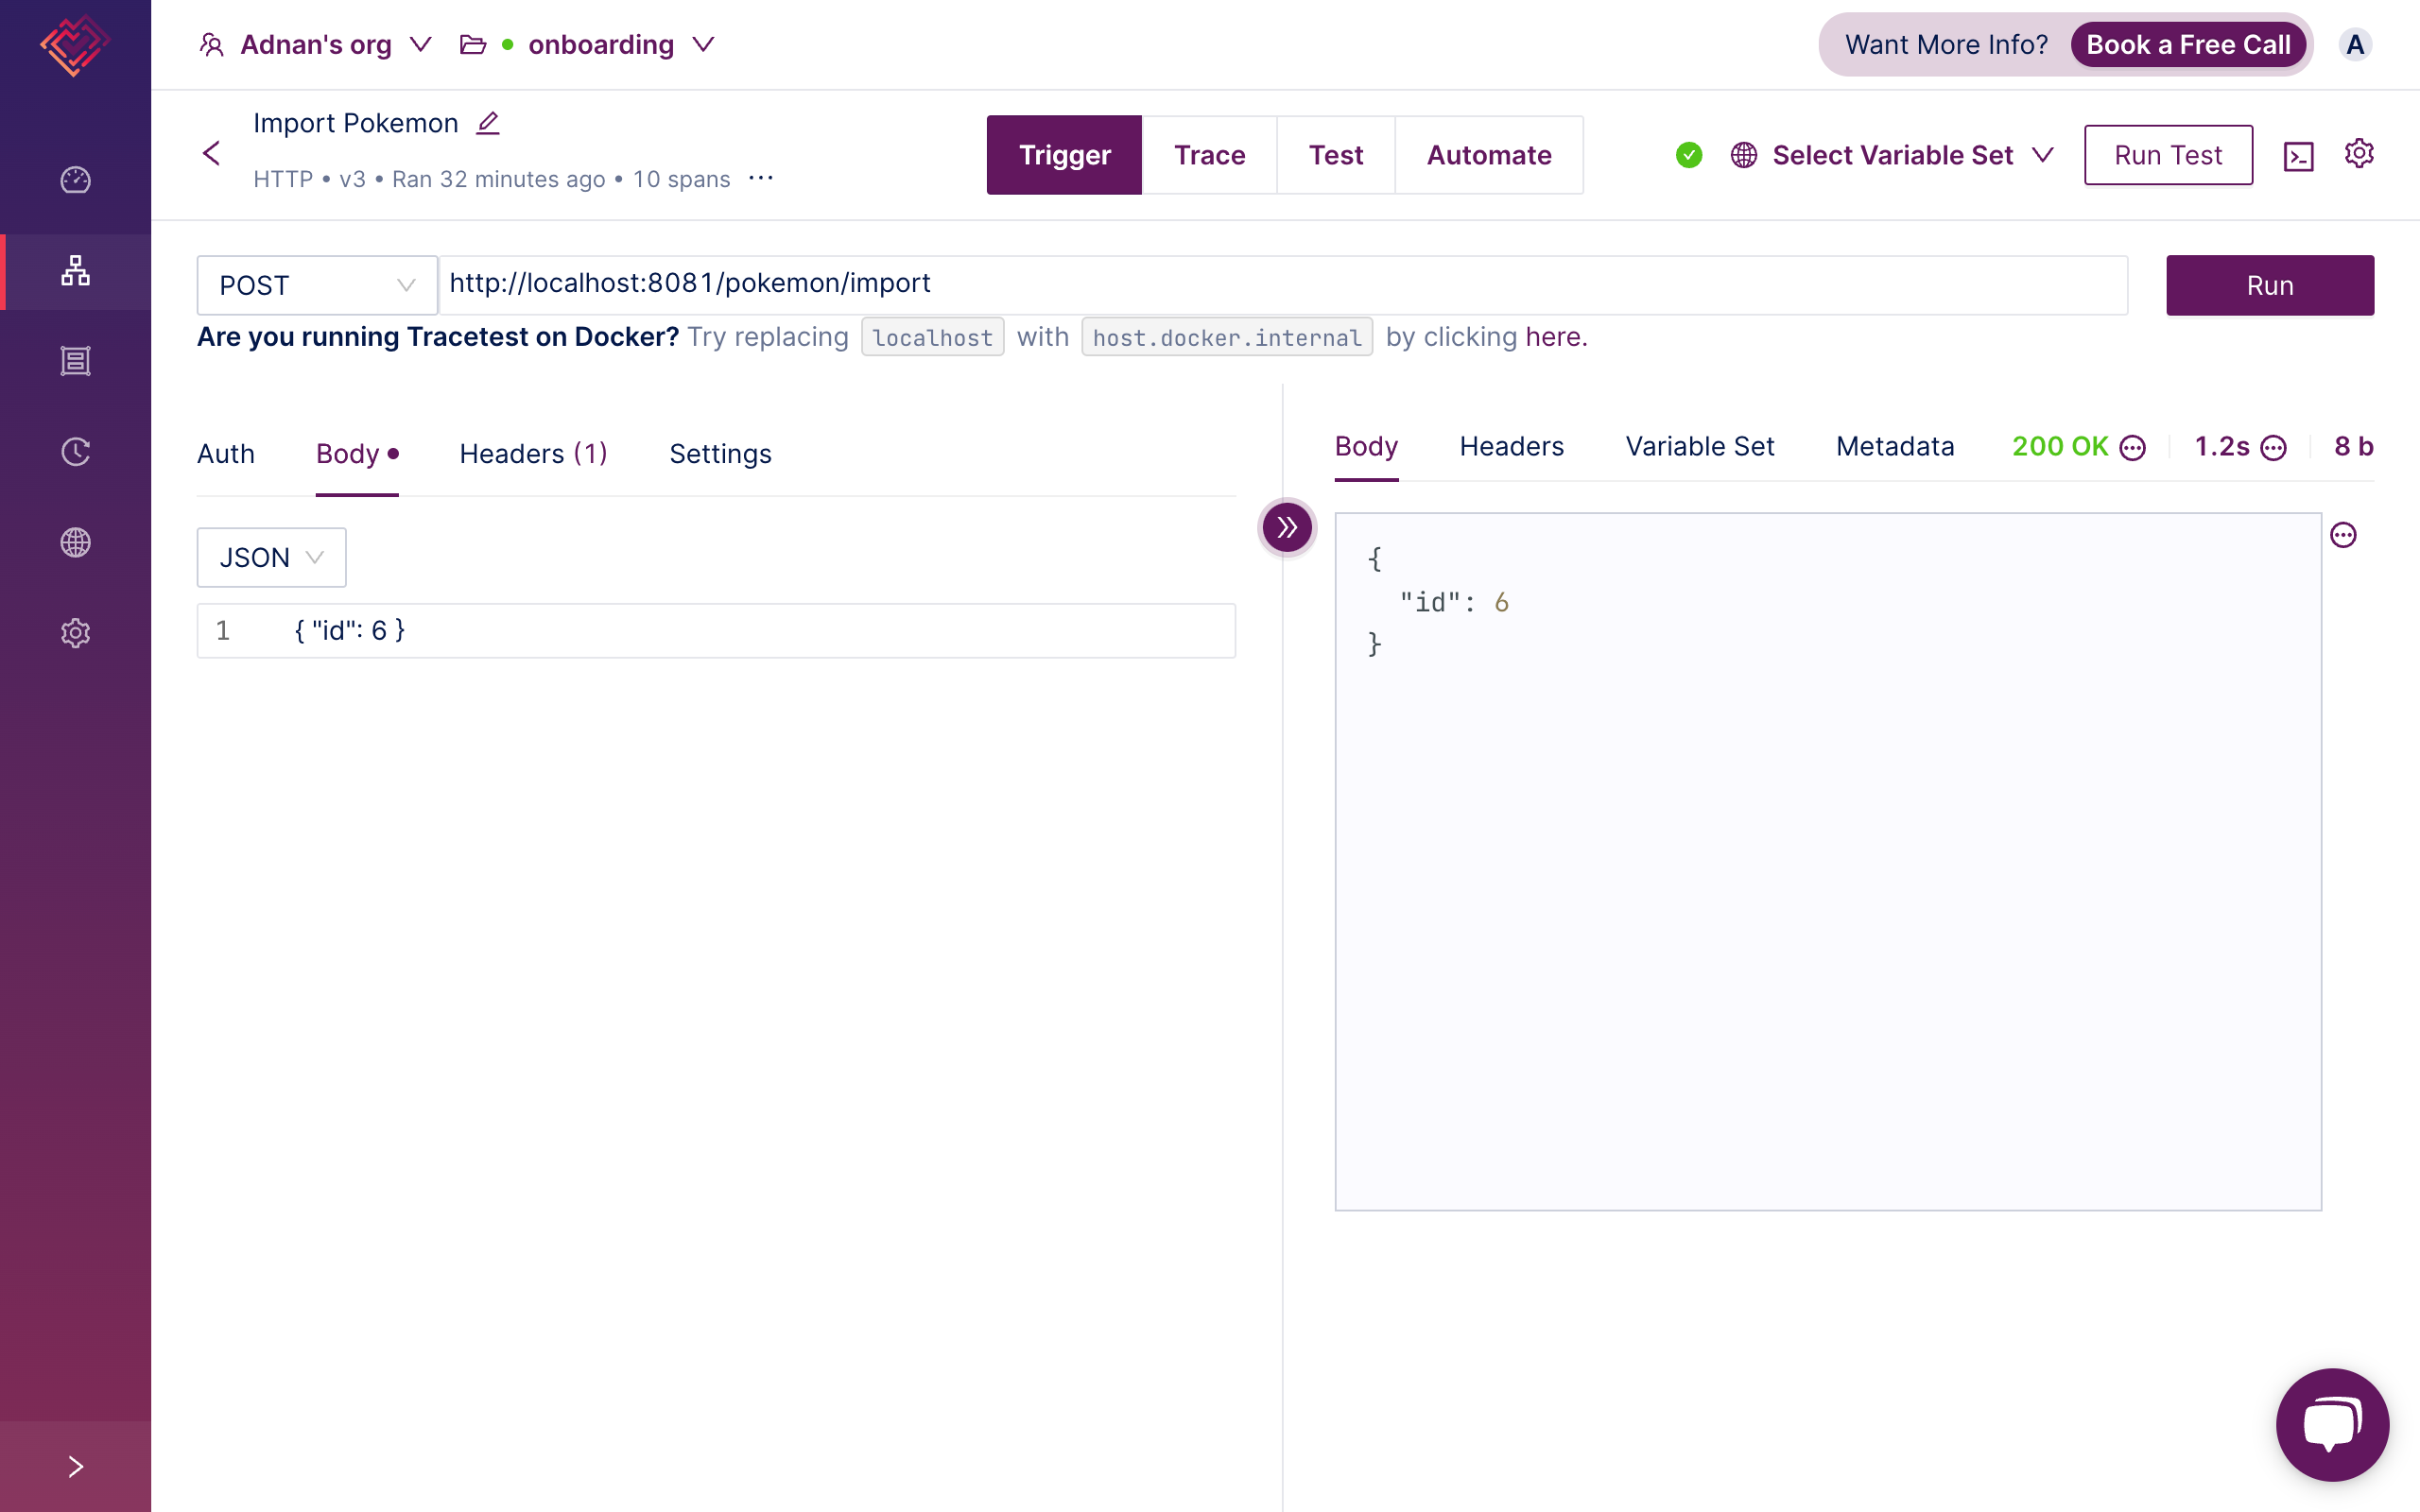
Enter http://localhost:8081/pokemon/import as the URL, select POST, add a JSON body { "id": 6 }, and click Run.
Enter http://api:8081/pokemon/import as the URL, select POST, add a JSON body { "id": 6 }, and click Run.
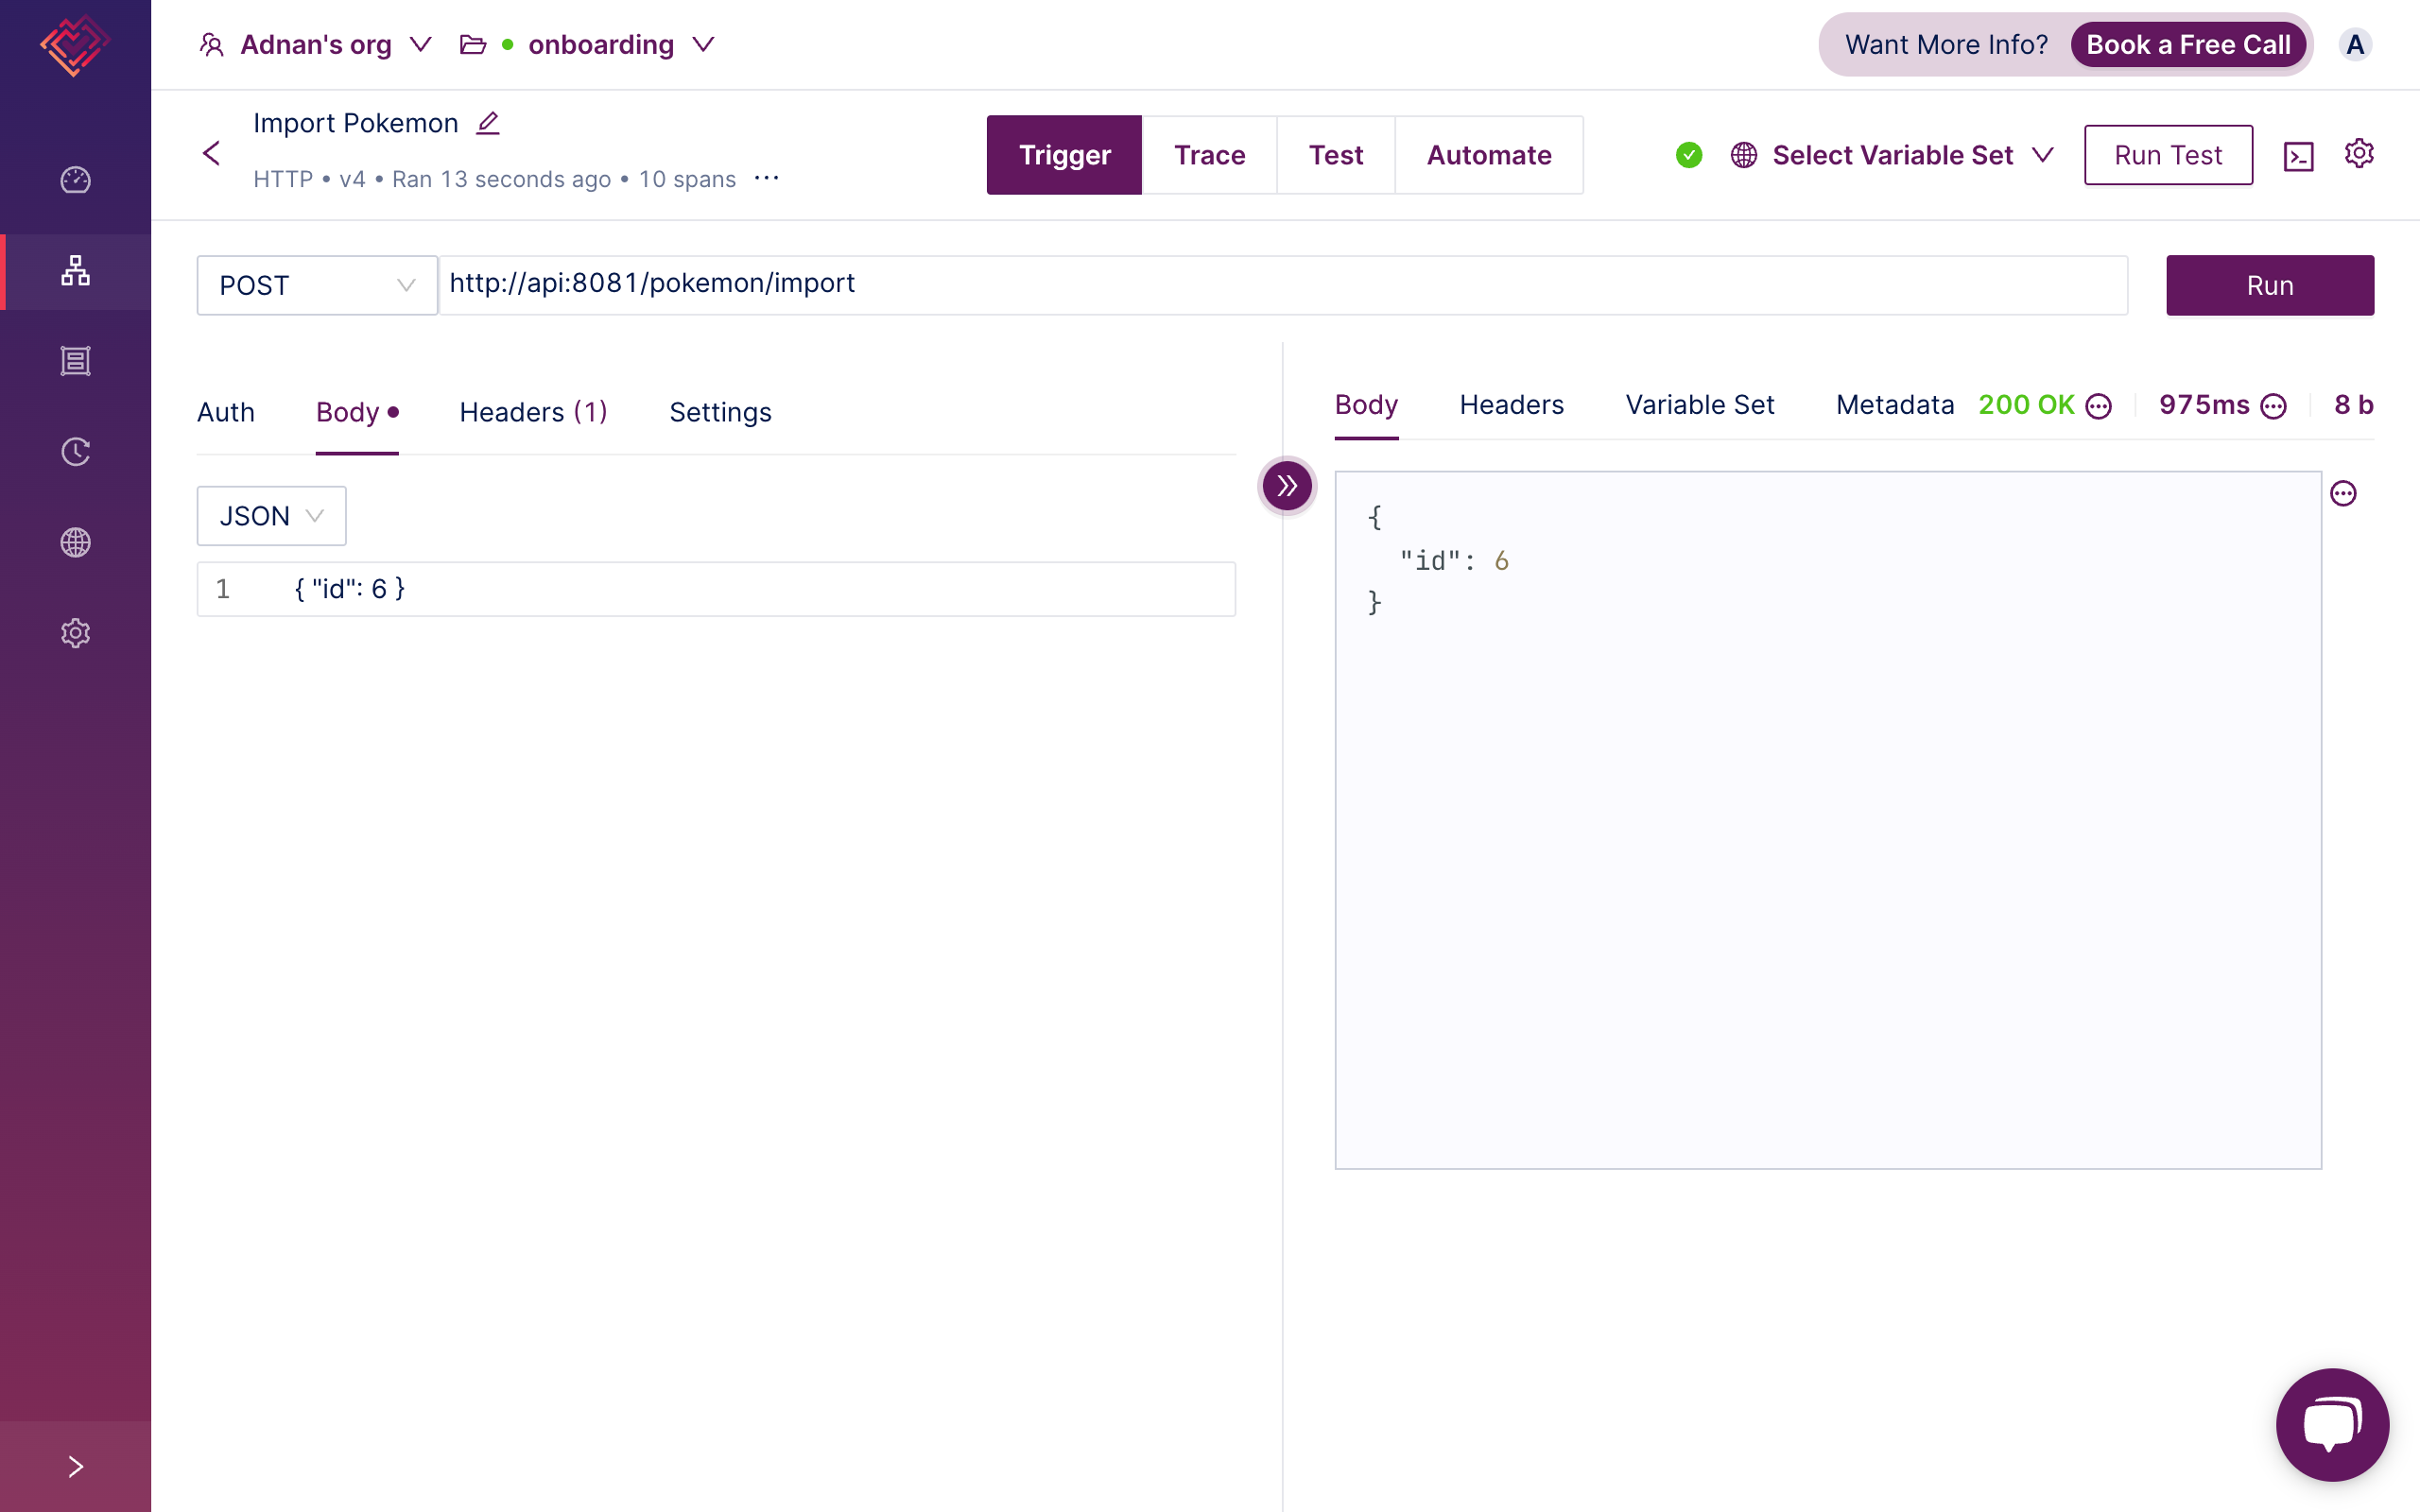
Enter http://api:8081/pokemon/import as the URL, select POST, add a JSON body { "id": 6 }, and click Run.

Enter http://api.default.svc.cluster.local:8081/pokemon/import as the URL, select POST, add a JSON body { "id": 6 }, and click Run.
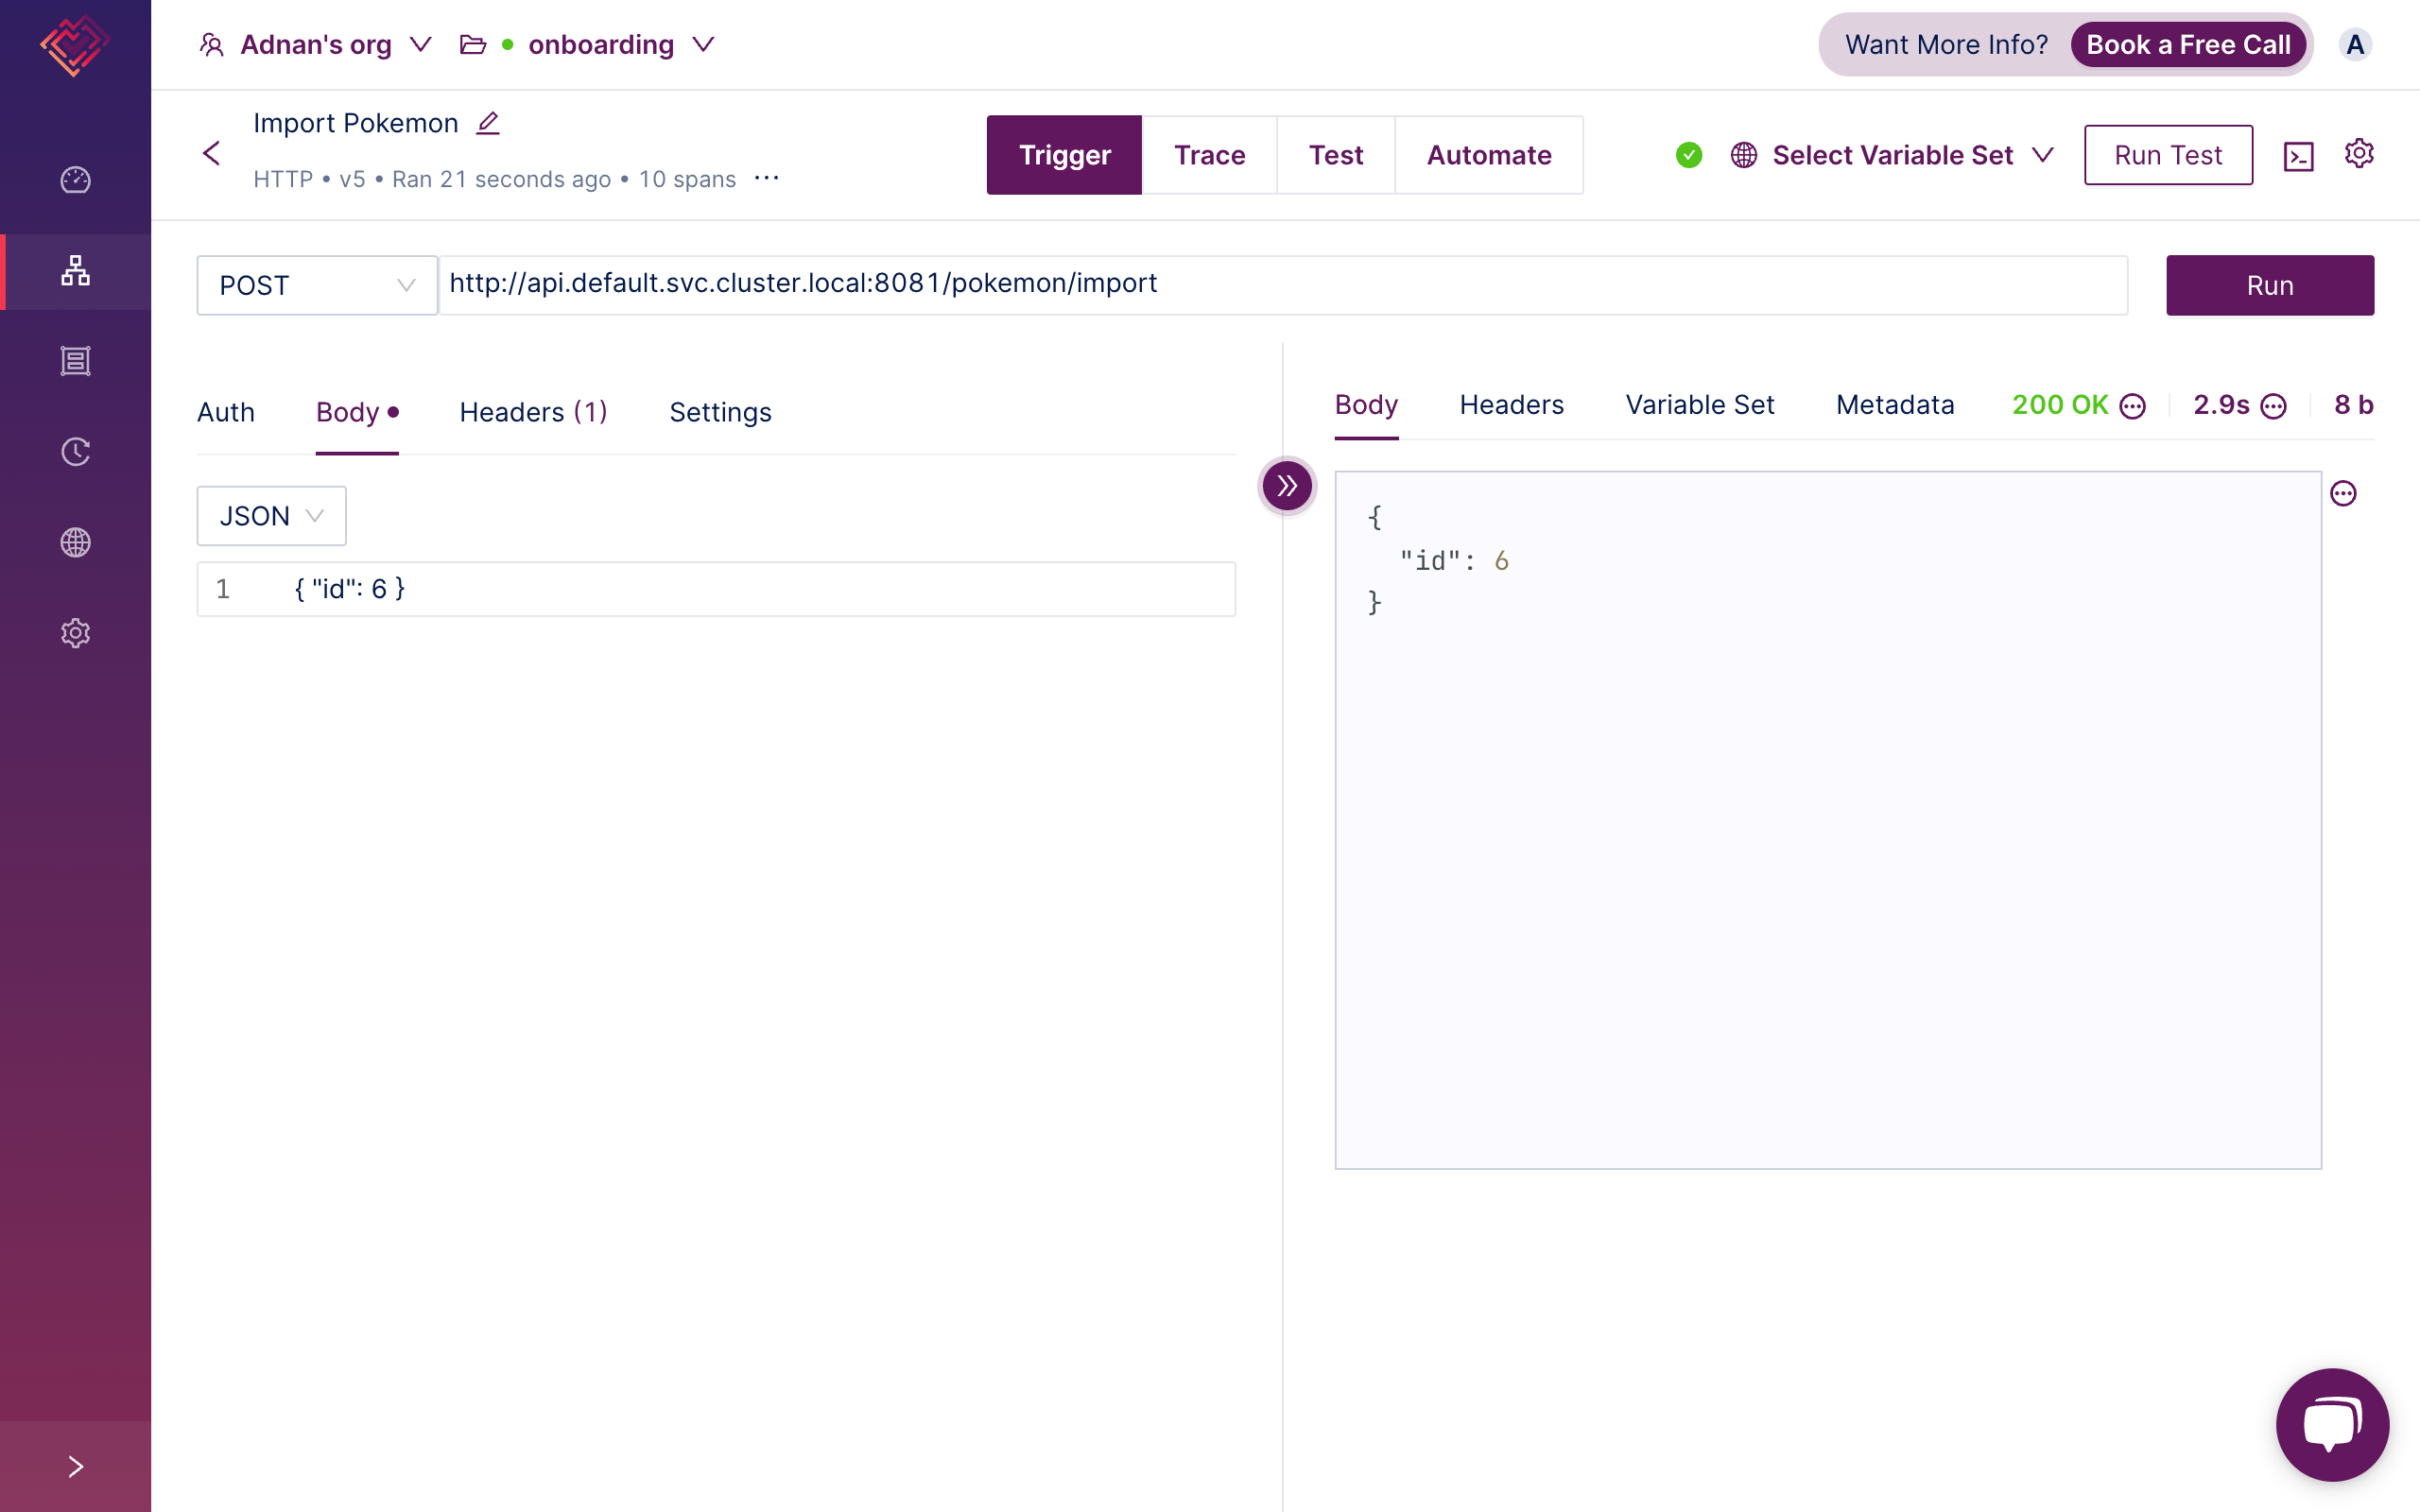
Enter http://pokeshop-pokemon-api:8081/pokemon/import as the URL, select POST, add a JSON body { "id": 6 }, and click Run.
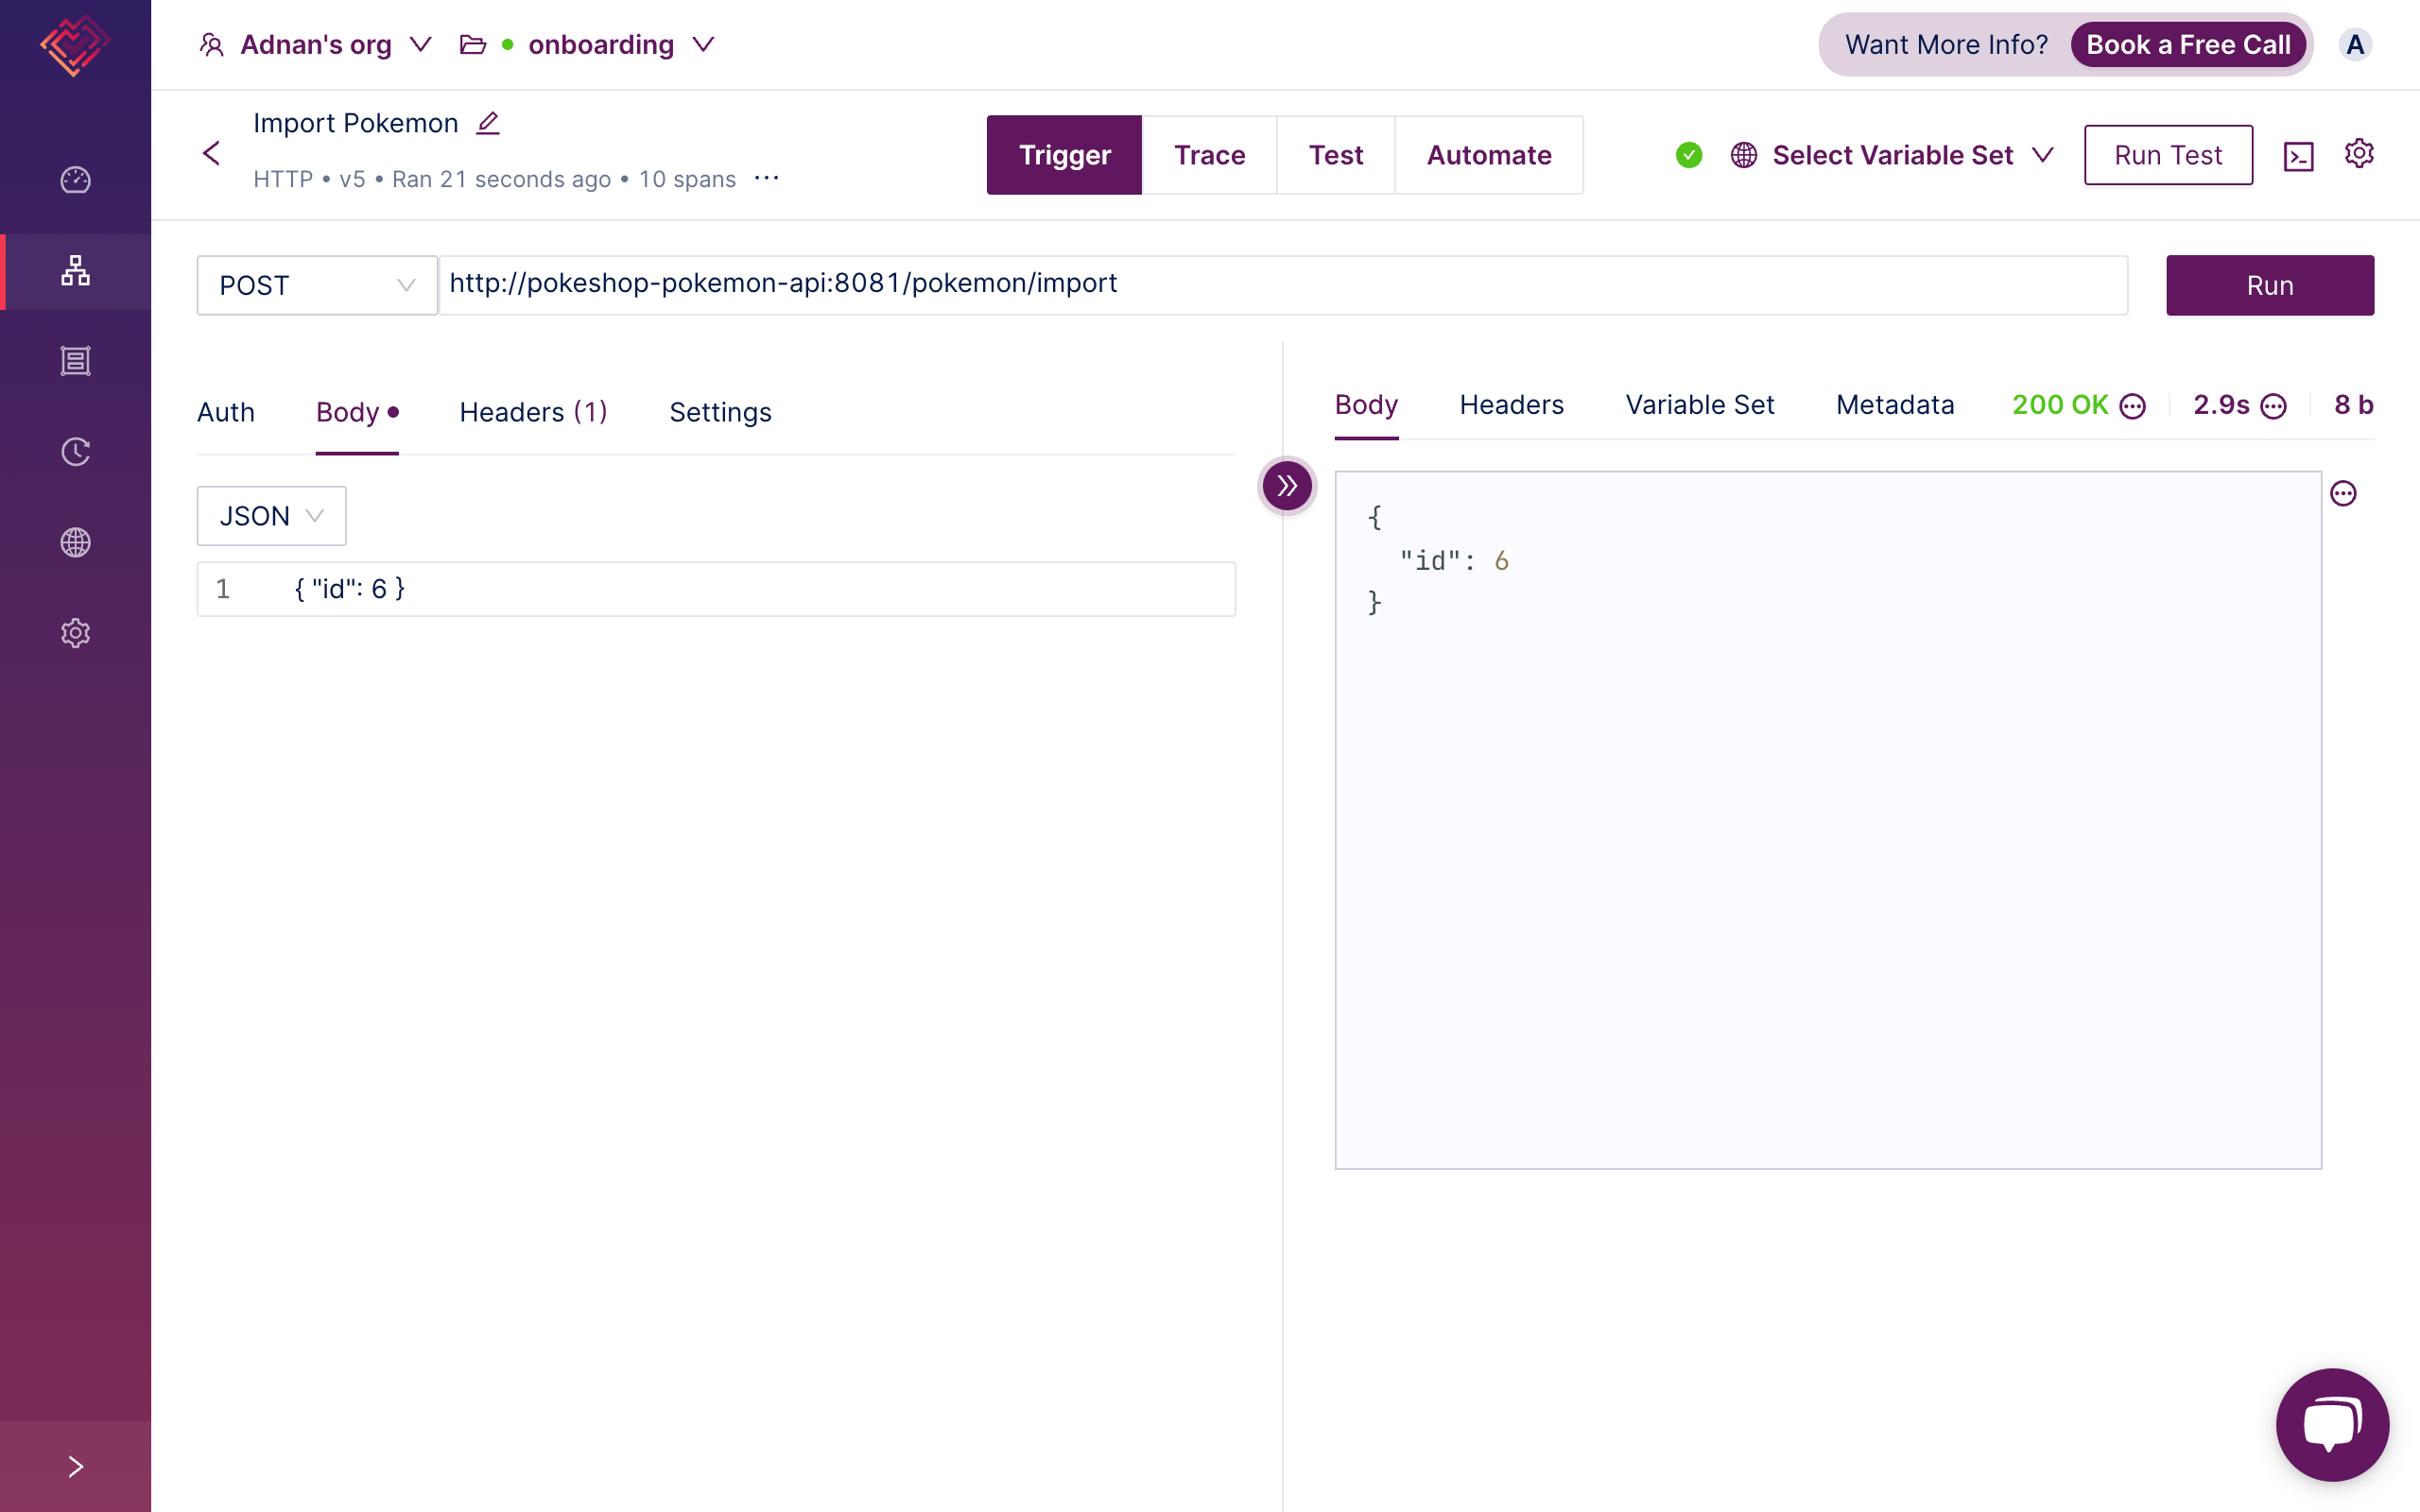
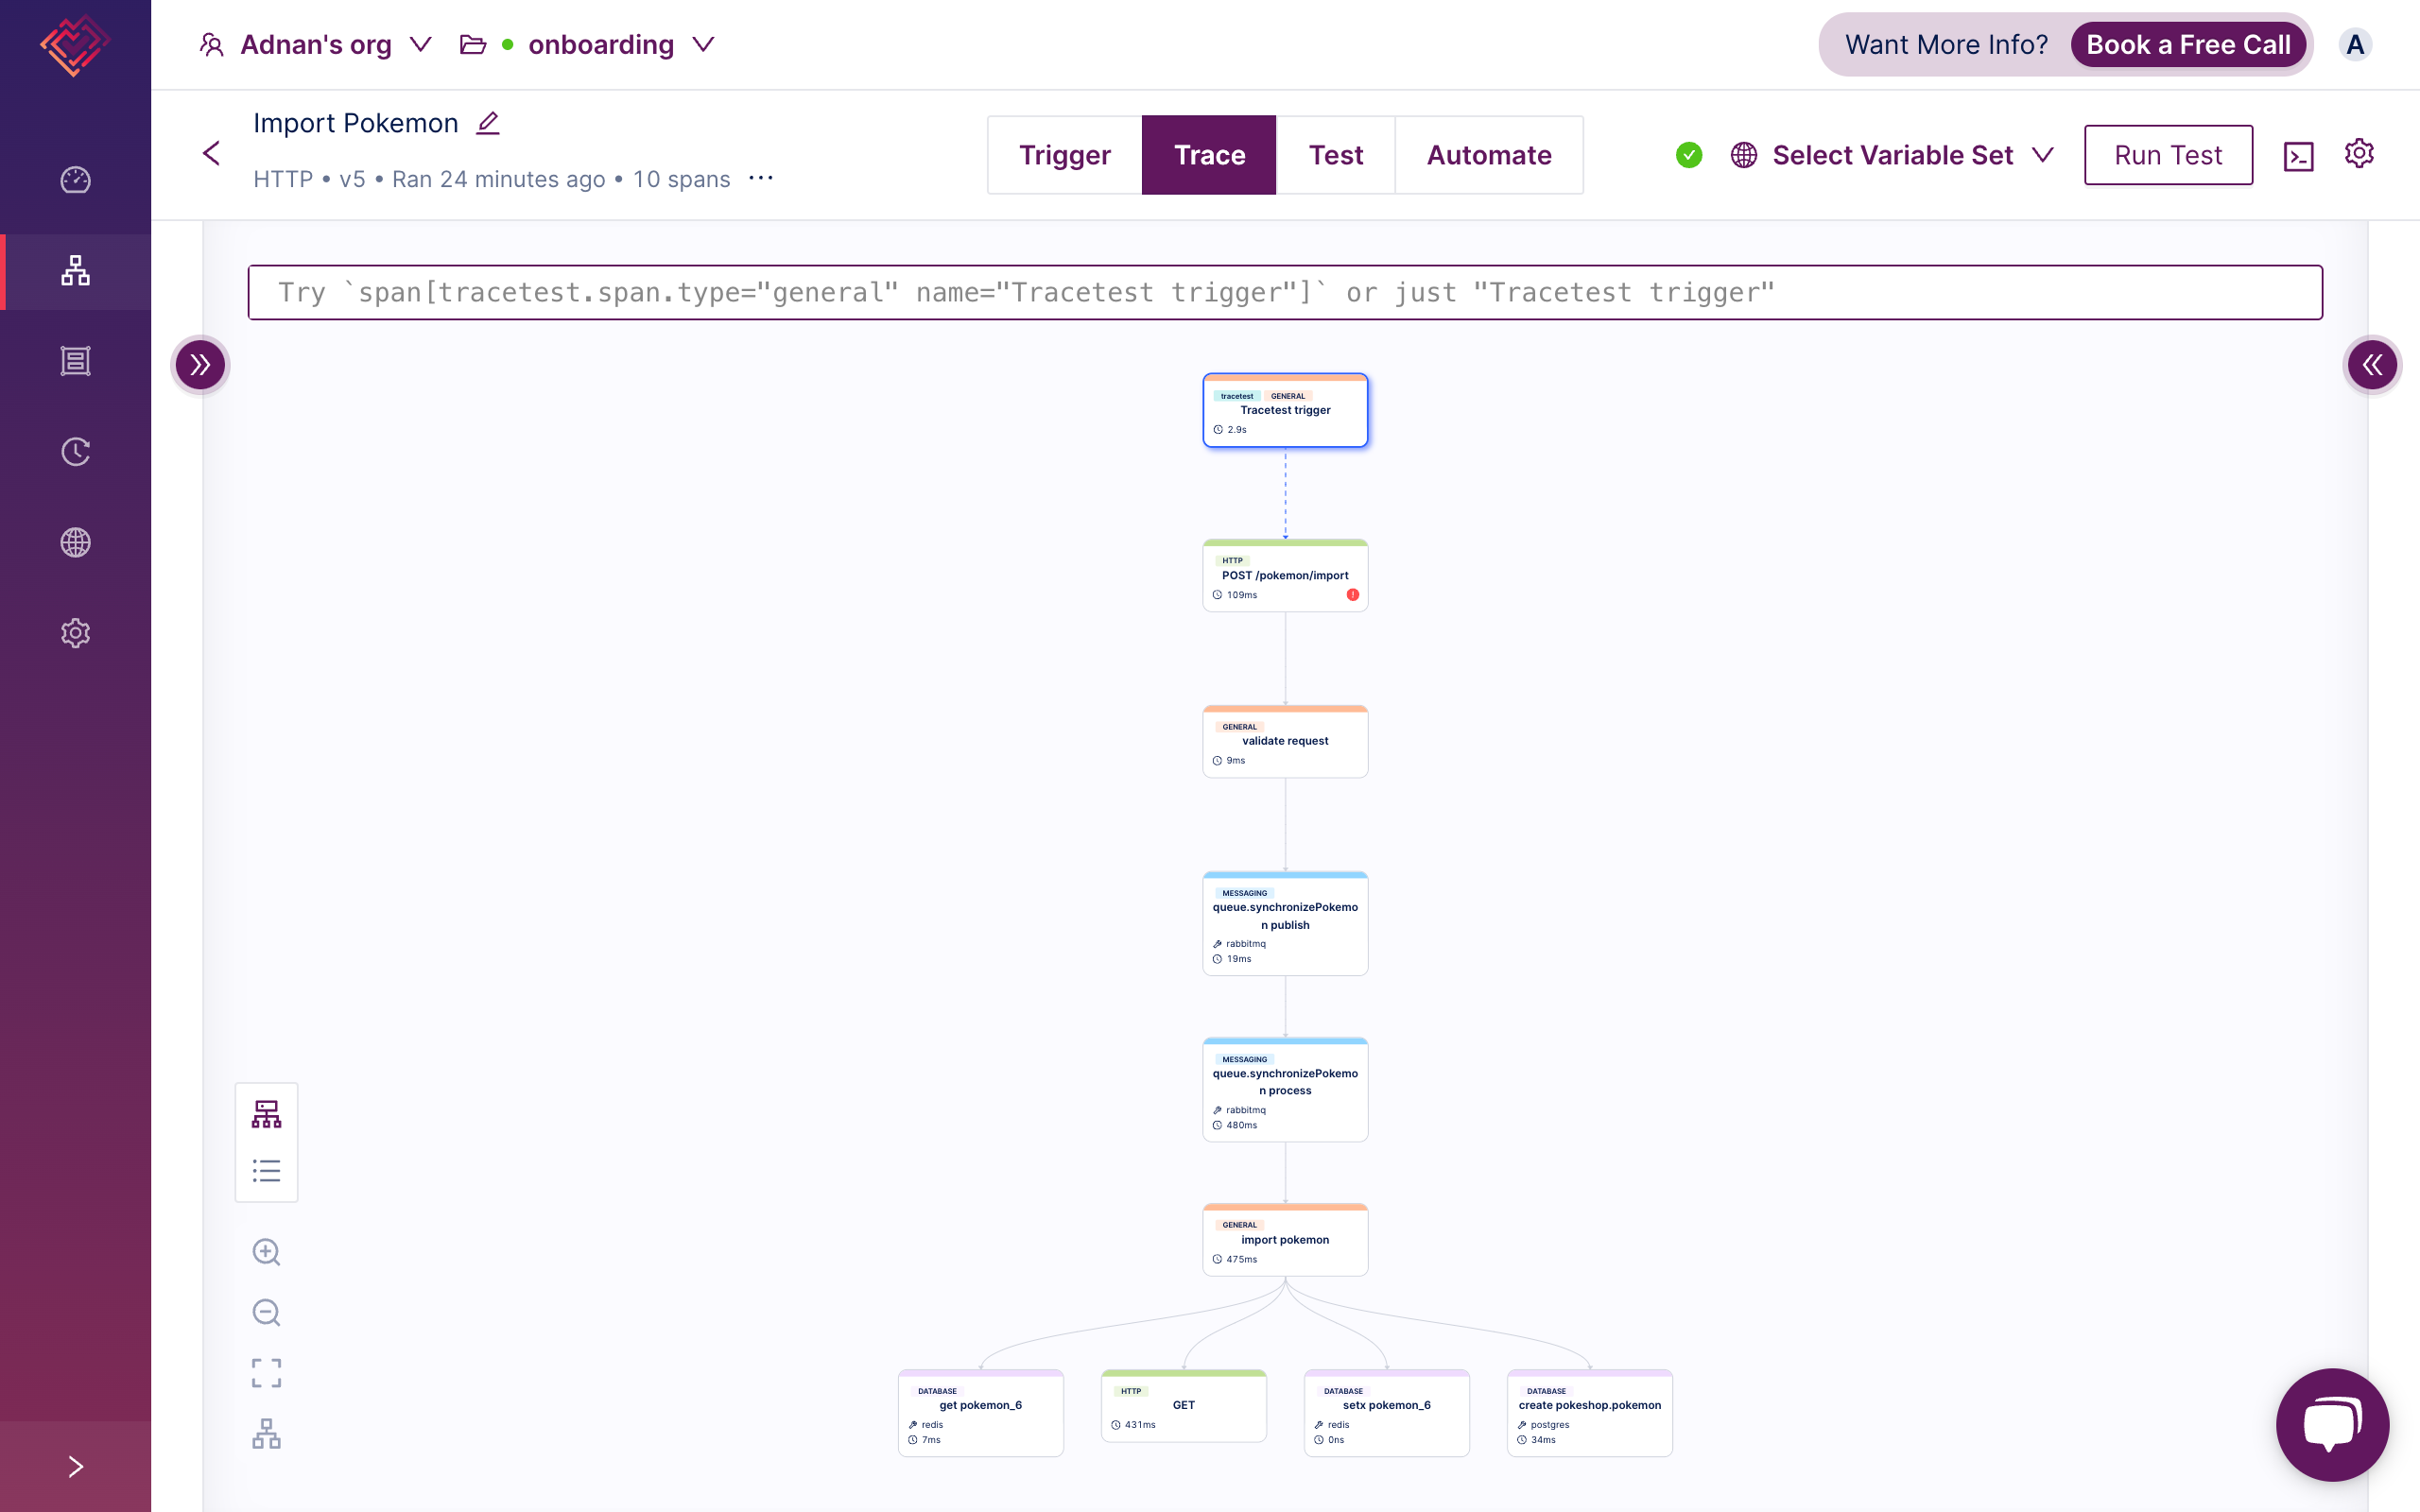
View the Trace Response
With trace ingestion configured you can view the resulting trace that was generated by the app. Every test you run will now have additional observability with distributed traces.
