Running Tests From the Command Line Interface (CLI)
Once you have created a test, whether from the Tracetest UI or via a text editor, you will need the capability to run it via the Command Line Interface (CLI) to integrate it into your CI/CD process or your local development workflow.
The documentation for running a test via the CLI can be found here:
- tracetest run: This page provides examples of using this command.
Running Your First Test
To run a test, give the path to the test definition file with the '-f' option. This will launch a test and provide a link to the created test run.
tracetest run test -f path/to/test.yaml
✘ Pokeshop - Import (http://localhost:11633/test/4oI08rA4g/run/12/test)
	✔ Response should be ok
		✔ #59ce1f4250482ba5
			✔ attr:tracetest.response.status = 200 (200)
	✔ JSON from external request should have name of 'meowth'
		✔ #efa1be47f04a0d43
			✔ attr:http.response.body| json_path '$.name' = "diglett" (diglett)
	✘ Postgres DB queries are fast
		✘ #f062f4d34031279e
			✘ attr:tracetest.span.duration < 20ms (23ms) (http://localhost:11633/test/4oI08rA4g/run/12/test?selectedAssertion=2&selectedSpan=f062f4d34031279e)
		✔ #0afed975903f2db5
			✔ attr:tracetest.span.duration < 20ms (636us)
		✔ #13ce59129b4e7e31
			✔ attr:tracetest.span.duration < 20ms (2ms)
Running the same command with the '-o json' option would change the output from the default of human readable 'pretty' to 'json'. This can be useful when you wish to extract particular data from the response. This would look like:
tracetest run test -f path/to/test.yaml -o json
{
  "testRunWebUrl": "http://localhost:11633/test/4oI08rA4g/run/13/test",
  "results": {
    "results": [
      {
        "results": [
          {
            "allPassed": true,
            "assertion": "attr:tracetest.response.status = 200",
            "spanResults": [
              {
                "observedValue": "200",
                "passed": true,
                "spanId": "92e4781f4961bbe9"
              }
            ]
          }
        ],
        "selector": {
          "query": "span[tracetest.span.type=\"general\" name=\"Tracetest trigger\"]",
          "structure": [
            {
              "filters": [
                {
                  "operator": "=",
                  "property": "tracetest.span.type",
                  "value": "general"
                },
                {
                  "operator": "=",
                  "property": "name",
                  "value": "Tracetest trigger"
                }
              ]
            }
          ]
        }
      },
      {
        "results": [
          {
            "assertion": "attr:http.response.body| json_path '$.name' = \"diglett\"",
            "spanResults": [
              {
                "error": "no match"
              }
            ]
          }
        ],
        "selector": {
          "query": "span[tracetest.span.type=\"http\" name=\"HTTP GET pokeapi.pokemon\" http.method=\"GET\"]",
          "structure": [
            {
              "filters": [
                {
                  "operator": "=",
                  "property": "tracetest.span.type",
                  "value": "http"
                },
                {
                  "operator": "=",
                  "property": "name",
                  "value": "HTTP GET pokeapi.pokemon"
                },
                {
                  "operator": "=",
                  "property": "http.method",
                  "value": "GET"
                }
              ]
            }
          ]
        }
      },
      {
        "results": [
          {
            "assertion": "attr:tracetest.span.duration \u003c 20ms",
            "spanResults": [
              {
                "error": "no match",
                "observedValue": "22ms",
                "spanId": "1755c8fc14905bd1"
              },
              {
                "observedValue": "574us",
                "passed": true,
                "spanId": "c41f9b8f49f6eb32"
              },
              {
                "observedValue": "1ms",
                "passed": true,
                "spanId": "48bef78ad4b3c3ab"
              }
            ]
          }
        ],
        "selector": {
          "query": "span[tracetest.span.type=\"database\" db.system=\"postgresql\"]",
          "structure": [
            {
              "filters": [
                {
                  "operator": "=",
                  "property": "tracetest.span.type",
                  "value": "database"
                },
                {
                  "operator": "=",
                  "property": "db.system",
                  "value": "postgresql"
                }
              ]
            }
          ]
        }
      }
    ]
  }
}
You can also opt to output the result as JUnit to a file. You would run the command with a -j option and a file name, ie:
tracetest run test -f path/to/test.yaml -j junit.out
The JUnit output file would then contain the JUnit result, for example:
<testsuites name="Pokeshop - Import" tests="5" failures="1" errors="0" skipped="0" time="10">
<testsuite name="span[tracetest.span.type="general" name="Tracetest trigger"]" tests="1" failures="0" errors="0" skipped="0">
<testcase name="attr:tracetest.response.status = 200"></testcase>
</testsuite>
<testsuite name="span[tracetest.span.type="http" name="HTTP GET pokeapi.pokemon" http.method="GET"]" tests="1" failures="0" errors="0" skipped="0">
<testcase name="attr:http.response.body| json_path '$.name' = "diglett""></testcase>
</testsuite>
<testsuite name="span[tracetest.span.type="database" db.system="postgresql"]" tests="3" failures="1" errors="0" skipped="0">
<testcase name="attr:tracetest.span.duration < 20ms">
<failure type="attr:tracetest.span.duration < 20ms" message="21ms"></failure>
</testcase>
<testcase name="attr:tracetest.span.duration < 20ms"></testcase>
<testcase name="attr:tracetest.span.duration < 20ms"></testcase>
</testsuite>
</testsuites>
Running a Test That Uses Variable Sets
There are two ways of referencing a variable set when running a test.
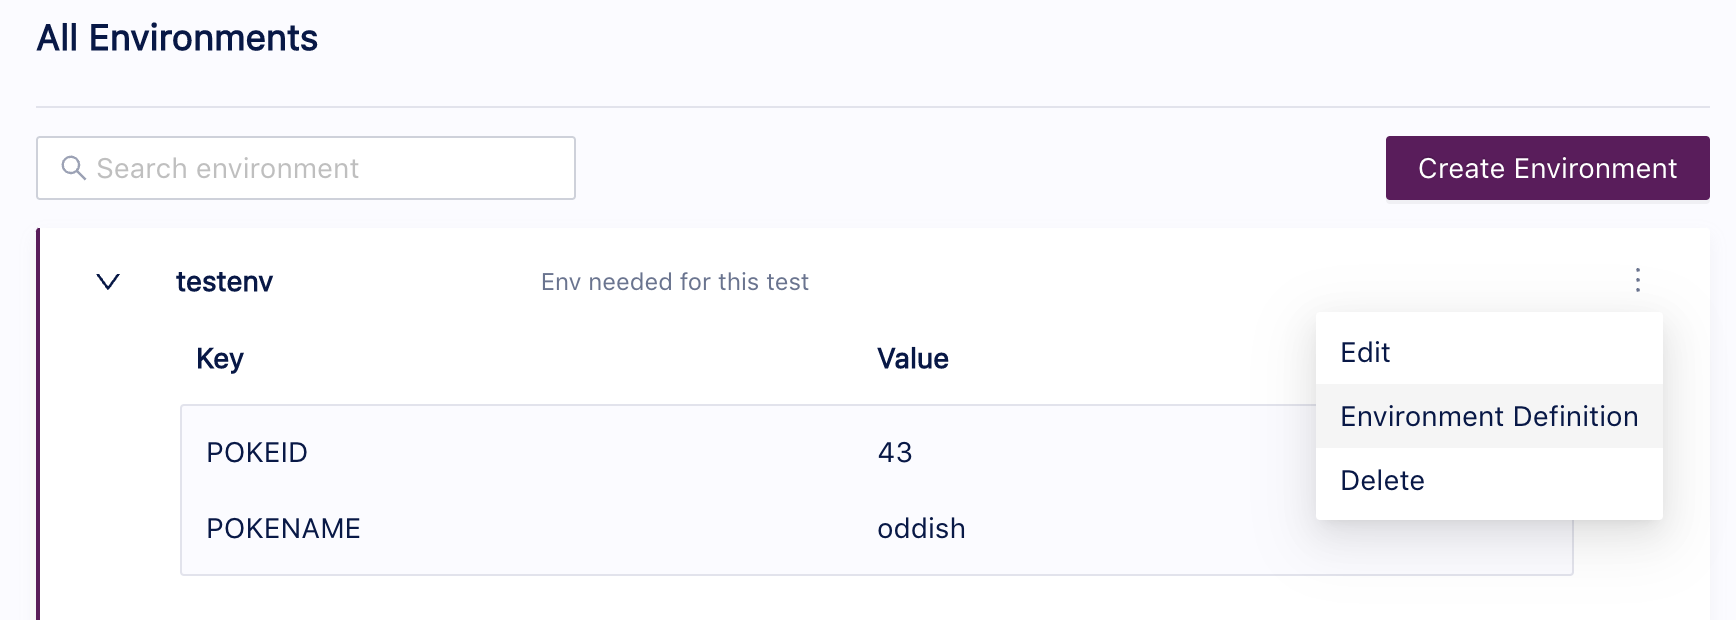
You can reference an existing variable set using its id. For example, given this defined variable set with an id of 'testenv':

We can run a test and specify that variable set with this command:
tracetest run test -f path/to/test.yaml -e testenv
You can also reference a variable set resource file which will be used to create a new variable set or update an existing one. For example, if you have a file named local.env with this content:
type: VariableSet
spec:
  id: local.env
  name: local.env
  values:
  - key: POKEID
    value: 45
  - key: POKENAME
    value: vileplume
tracetest run test -f path/to/test.yaml --vars path/to/local.env
If you use the variable set resource approach, a new variable set will be created in Tracetest.
The second approach is very useful if you are running tests from a CI pipeline.