Opening Tracetest
This page showcases opening the Tracetest Web UI and creating a test against the microservice sample Pokeshop API.
Once you've signed in to Tracetest, as explained in the installation guide, the Tracetest Agent is running in your environment on ports 4317 and 4318, or you'll get an API endpoint if you're using the Tracetest Cloud Agent.
You access the Tracetest Web UI on app.tracetest.io. Here's what will greet you after a fresh install.

Start the Sample Pokeshop API
To create tests quickly, start the official sample called Pokeshop API.
git clone --depth 1 https://github.com/kubeshop/tracetest.git
cd tracetest/examples/tracetest-agent/pokeshop/
docker-compose up
This will start an HTTP API on localhost:8081 and a GRPC API on localhost:8082.
Click to view the sample Pokeshop API architecture
Here's the Architecture of the Pokeshop Sample App:
- an API that serves client requests,
- a Worker who deals with background processes.
The communication between the API and Worker is made using a RabbitMQ queue, and both services emit telemetry data to OpenTelemetry Collector and communicate with a Postgres database.
Tracetest triggers tests against the Node.js API.
Creating Trace-based Tests
You can create tests in two ways:
- Visually, in the Web UI
- Programmatically, in YAML
Creating Trace-based Tests Visually
This guide will show how to create end-to-end and integration tests in less than 5 minutes via the Web UI.
To view the in-depth guide on creating tests visually, check out this docs page.
Create
On the top right, click the Create button and select Create New Test in the drop down.

Select an HTTP Request as the test trigger. Clicking Create & Run will save and trigger the test.

Trigger
You'll be redirected to the test page where you can see four tabs and depending on which one you select you'll get access to:
- Test trigger and results.
- The entire distributed trace and trace analysis.
- Test specification and assertions.
- How to automate the test.
To view the in-depth guide on test results, check out this docs page.
The Trigger tab shows how the test was triggered and what the API response was.

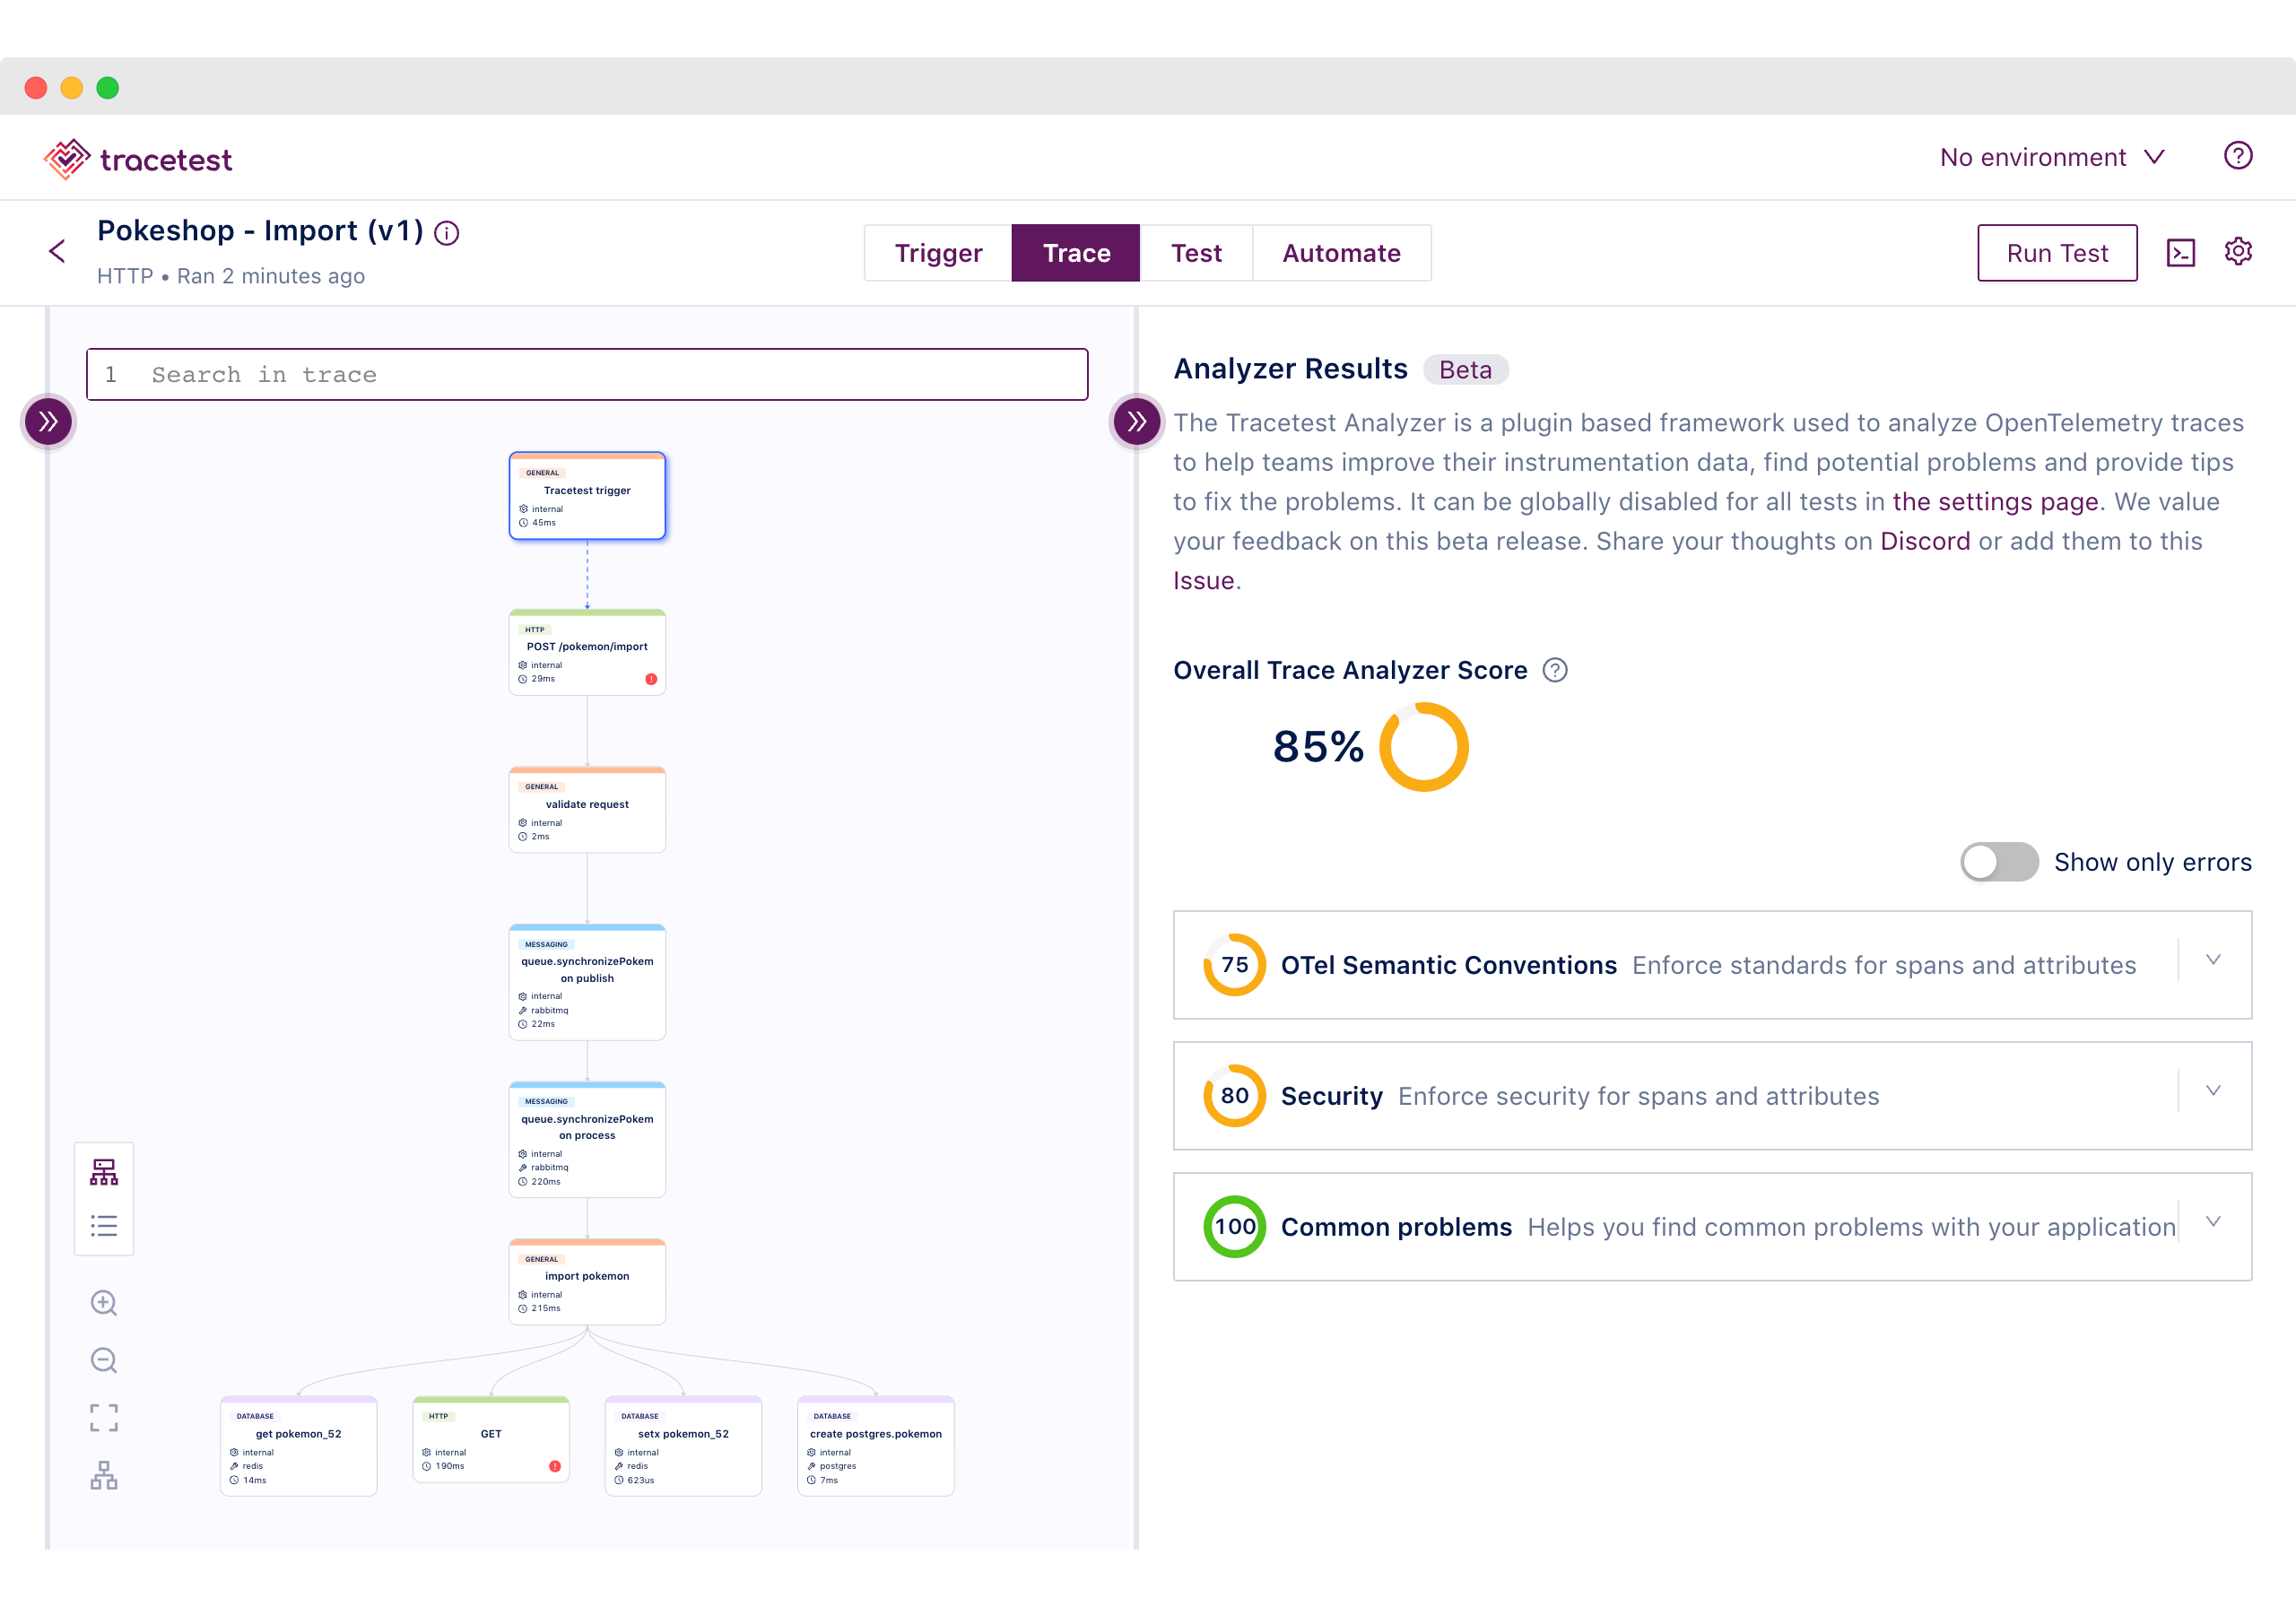
Trace
The Trace tab shows the entire distributed trace for debugging and a trace analysis score.
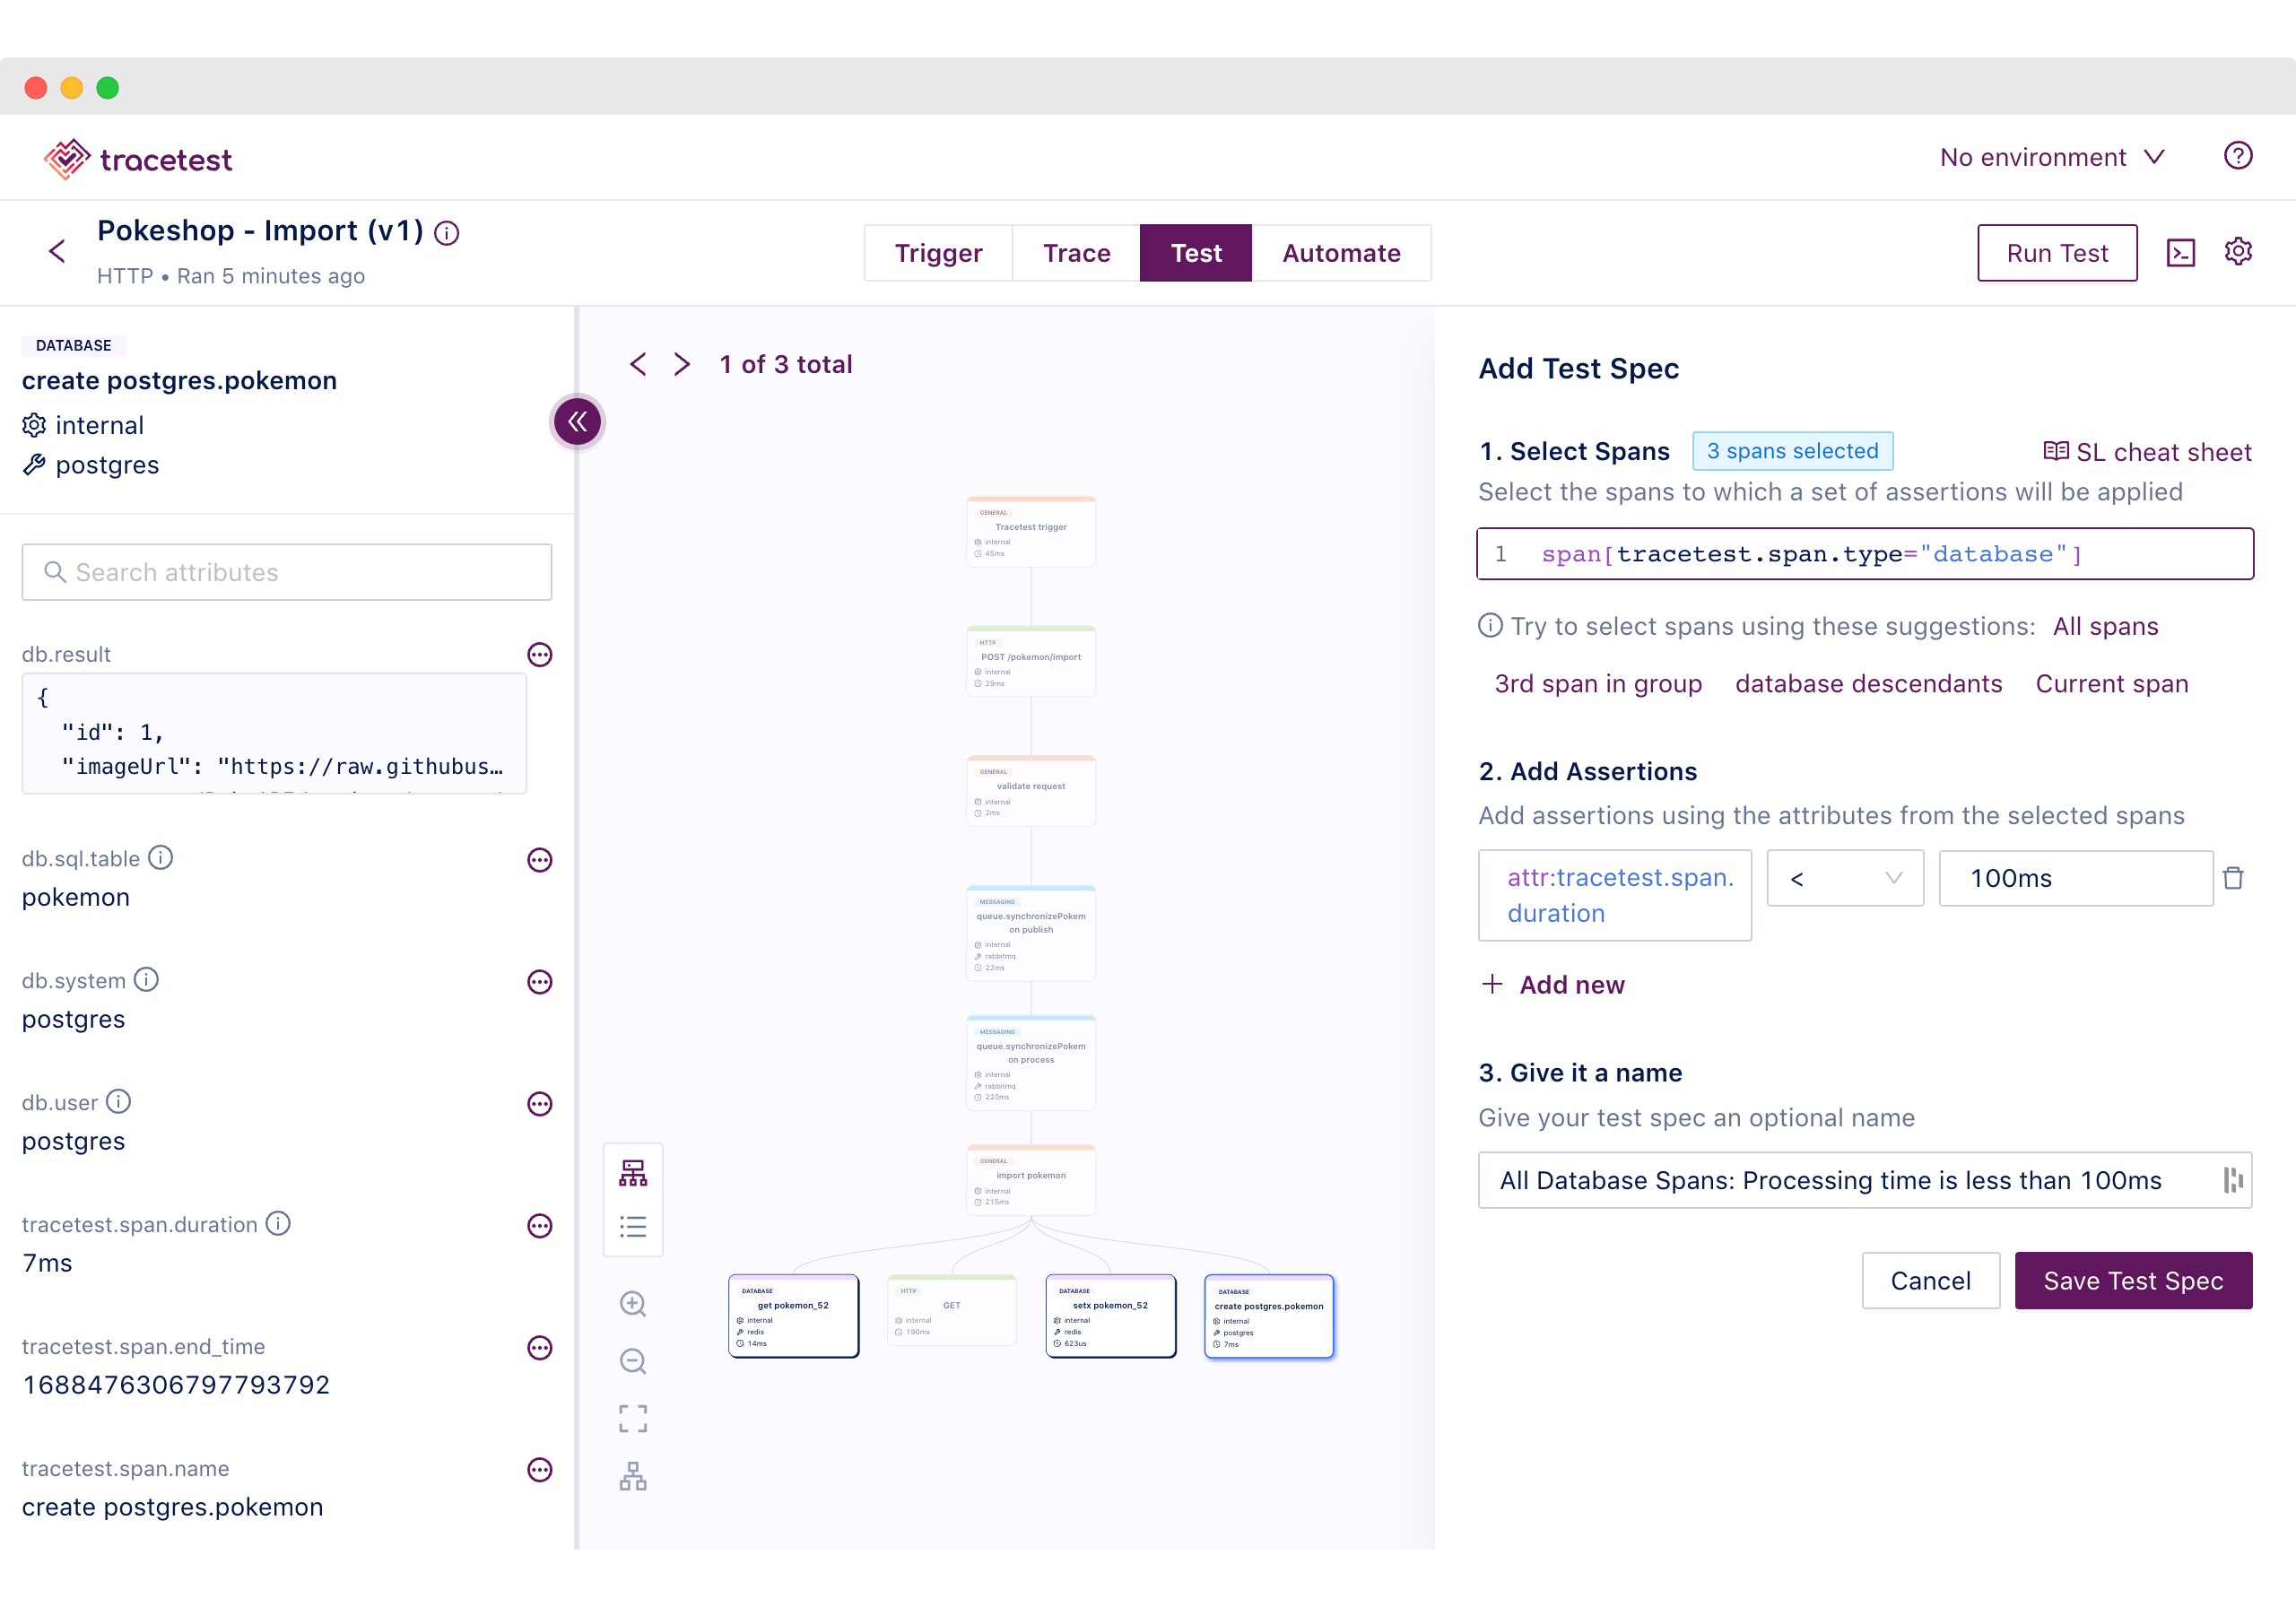
Test
The Test tab shows span attributes. Here you add test specs and assertions on attribute values. You also get a test snippets out-of-the-box for common test cases.
In the sample below, you see how to assert that all database spans return in less than 100ms.
Automate
The Automate tab shows how to automate the test run with the Tracetest CLI and other automation options.
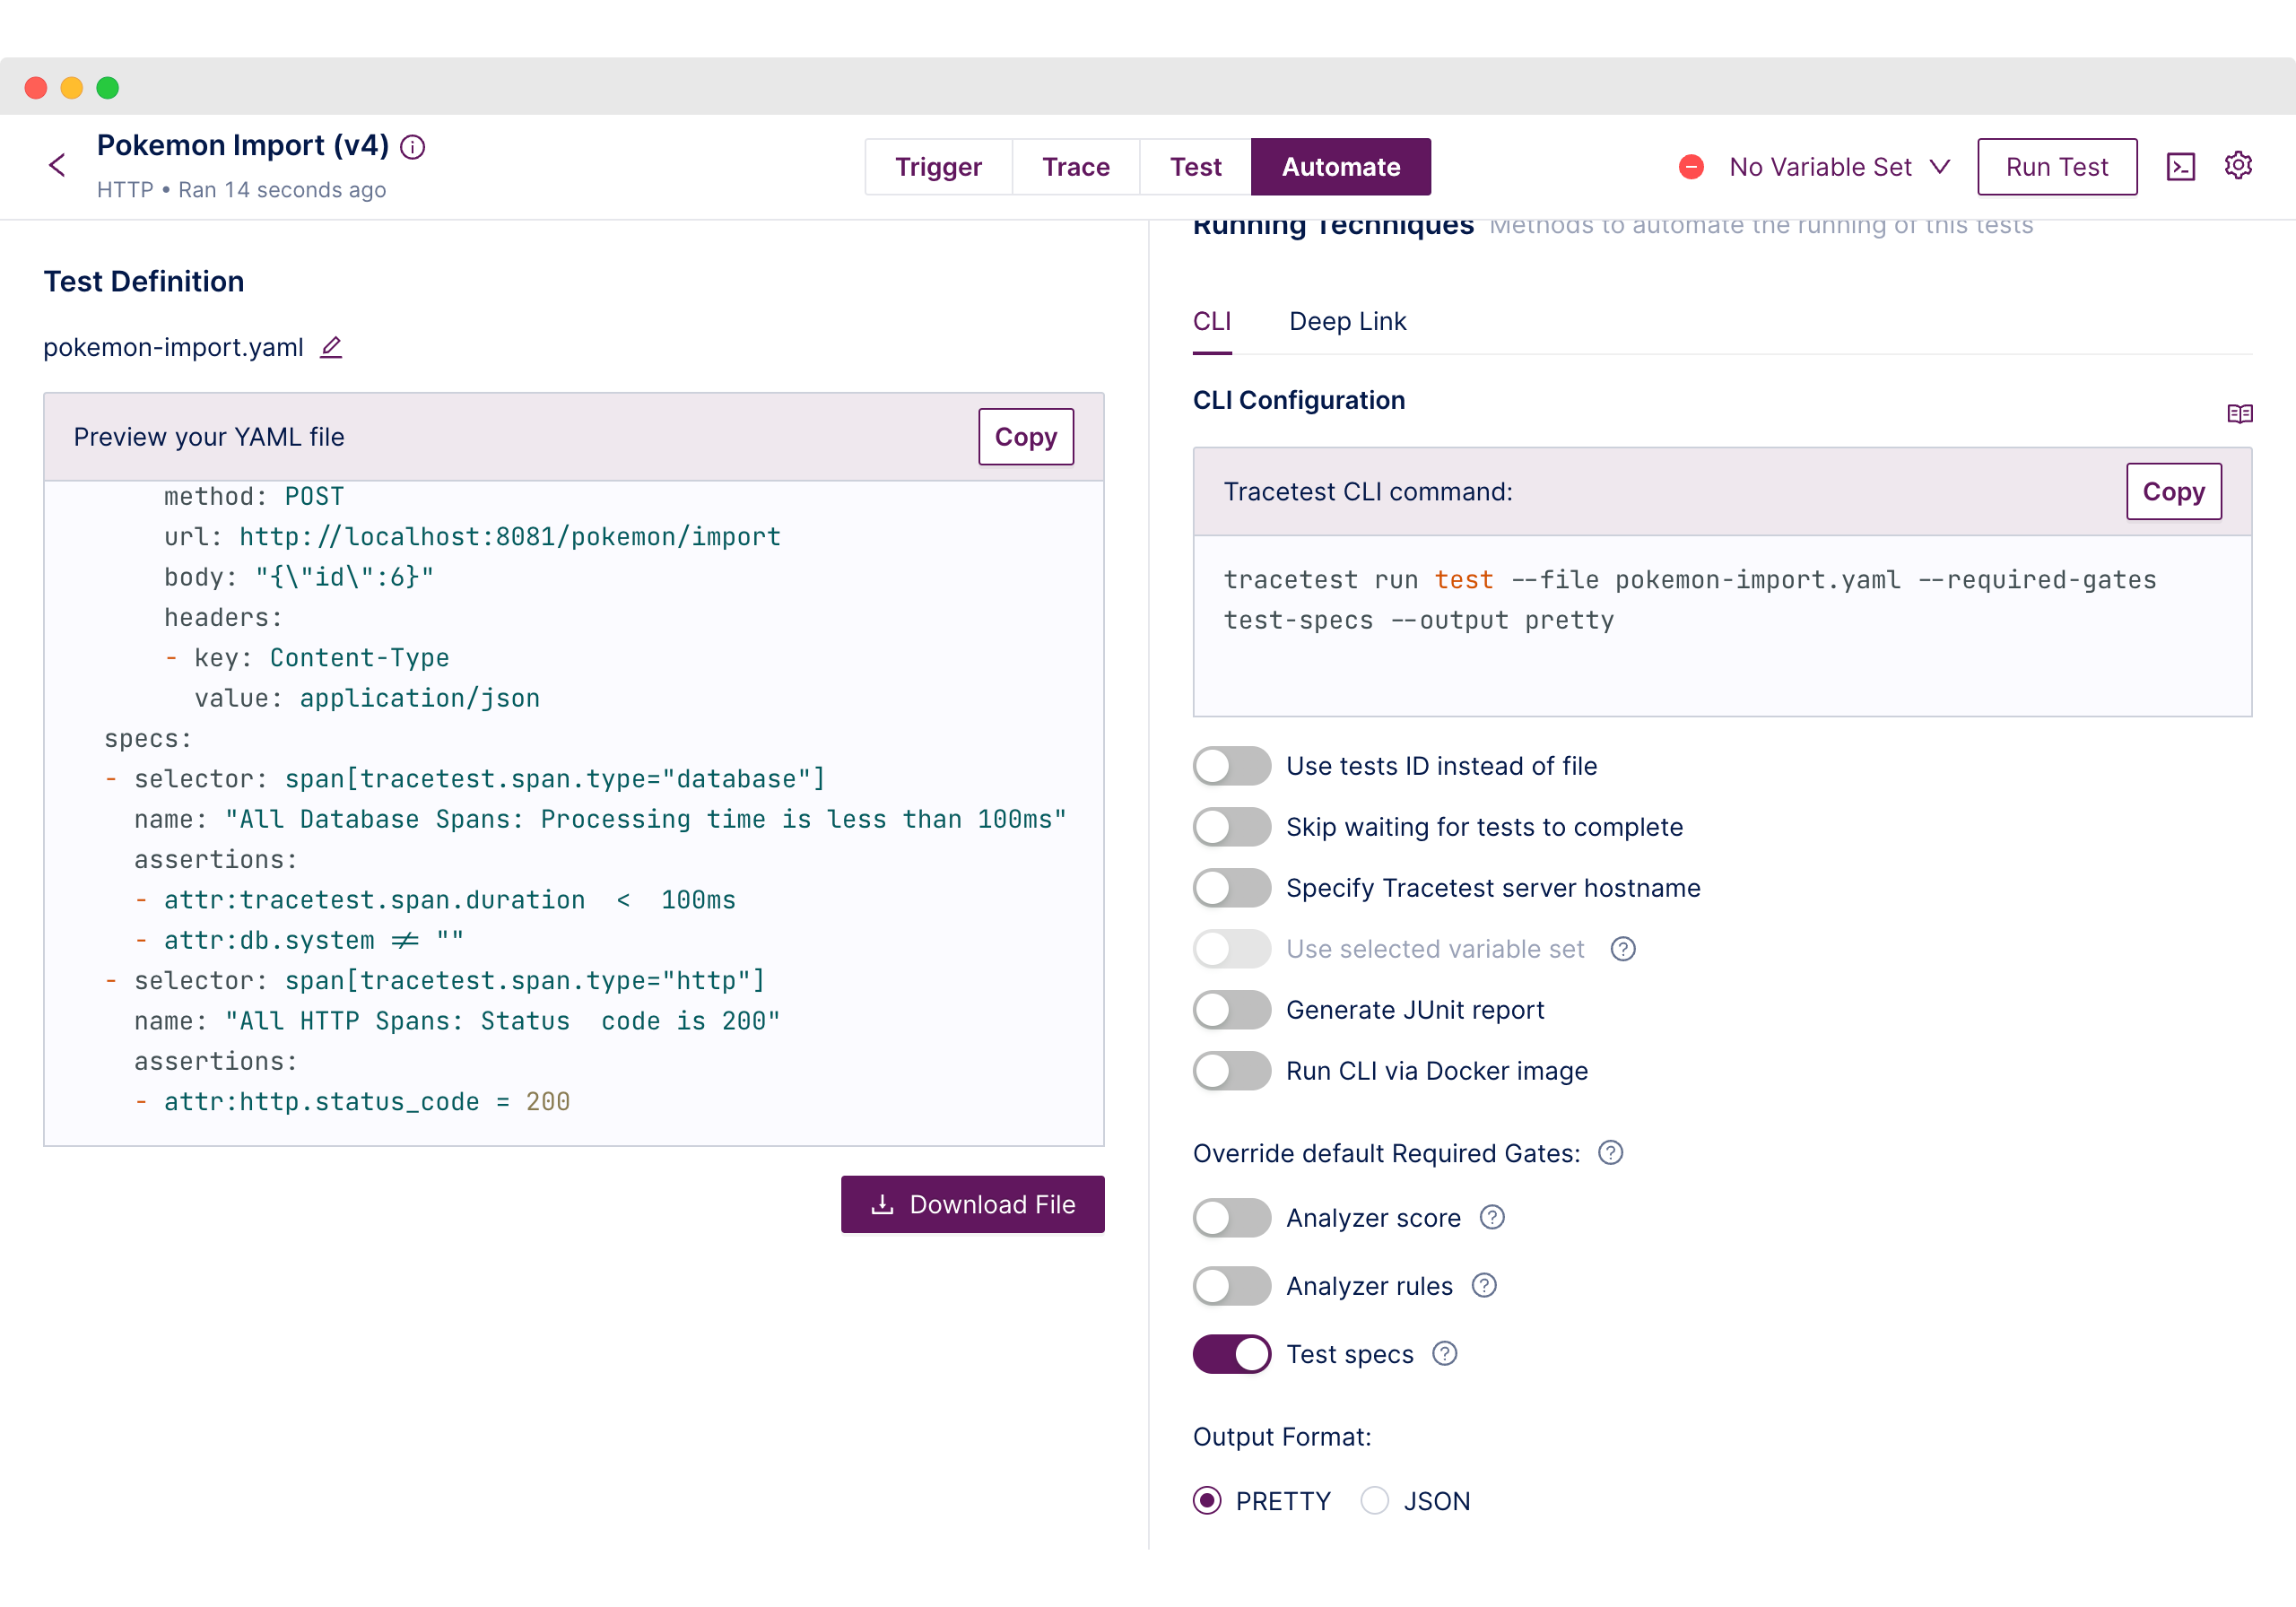
From here you can download a YAML file test definition and run it with the CLI.
Creating Trace-based Tests Programatically
The test definition will contain:
- The Trigger for the test in the
triggersection. - The Test Specifications in the
specssection.
You can either download the YAML file test definition, or write one from scratch.
Create
Using the sample from above, create the Trace-based Test programatically.
type: Test
spec:
  id: T7-delWIR
  name: Pokemon Import
  trigger:
    type: http
    httpRequest:
      method: POST
      url: http://localhost:8081/pokemon/import
      body: "{\"id\":52}"
      headers:
      - key: Content-Type
        value: application/json
  specs:
  - selector: span[tracetest.span.type="database"]
    name: "All Database Spans: Processing time is less than 100ms"
    assertions:
    - attr:tracetest.span.duration  <  100ms
    - attr:db.system != ""
  - selector: span[tracetest.span.type="http"]
    name: "All HTTP Spans: Status code is 200"
    assertions:
    - attr:http.status_code = 200
Trigger
Using the CLI, trigger a test run.
tracetest run test -f pokemon-import.yaml --required-gates test-specs --output pretty
Output
The test run will complete and show a result.
✔ Pokemon Import (https://app.tracetest.io/organizations/<org_id>/environments/<env_id>/test/T7-delWIR/run/7/test) - trace id: <trace_id>
	✔ All Database Spans: Processing time is less than 100ms
	✔ All HTTP Spans: Status code is 200
The provided link in the test output will open the test run in the Tracetest Web UI.